![Orchidea logo white with orange dot.png]](https://knowledge.orchidea.dev/hs-fs/hubfs/Orchidea%20logo%20white%20with%20orange%20dot.png?width=161&height=51&name=Orchidea%20logo%20white%20with%20orange%20dot.png)
📌This feature is available on Orchidea Professional and Enterprise plans
Follow these steps to enable Azure Entra ID SSO in the Azure portal.
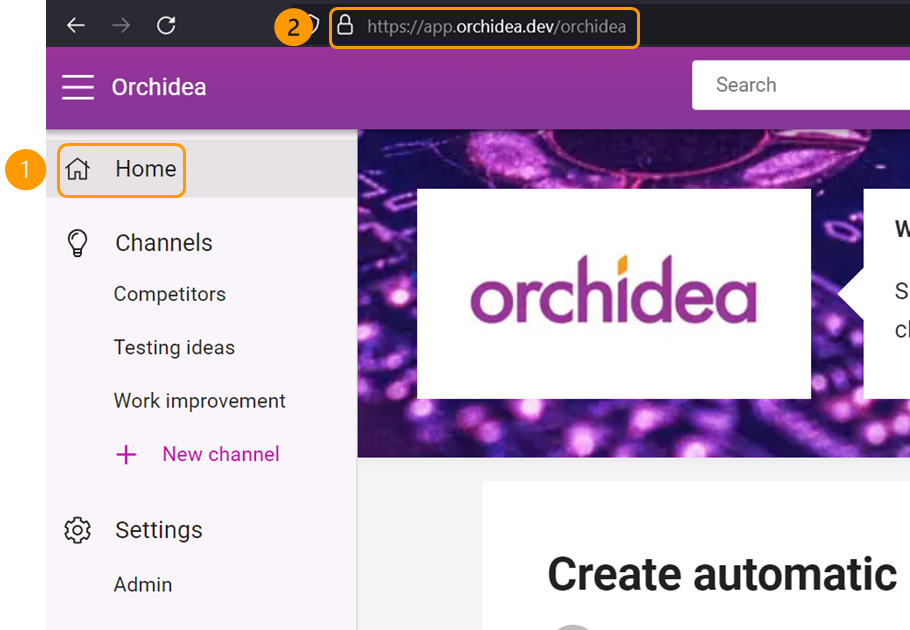
- Click Home on the left side navigation in Orchidea. Then, from the browser address bar, write down the address of the Orchidea home page, which is in the format https://app.orchidea.dev/workspacename.
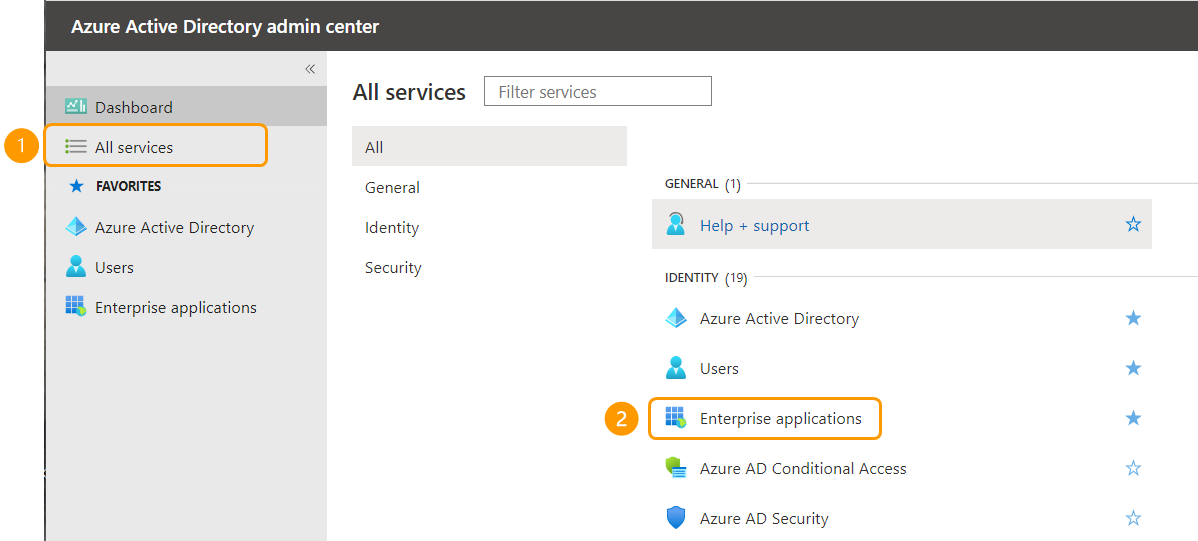
- Go to Azure Active Directory admin center. There, select All services from the left navigation. In the appearing menu, click Enterprise applications.
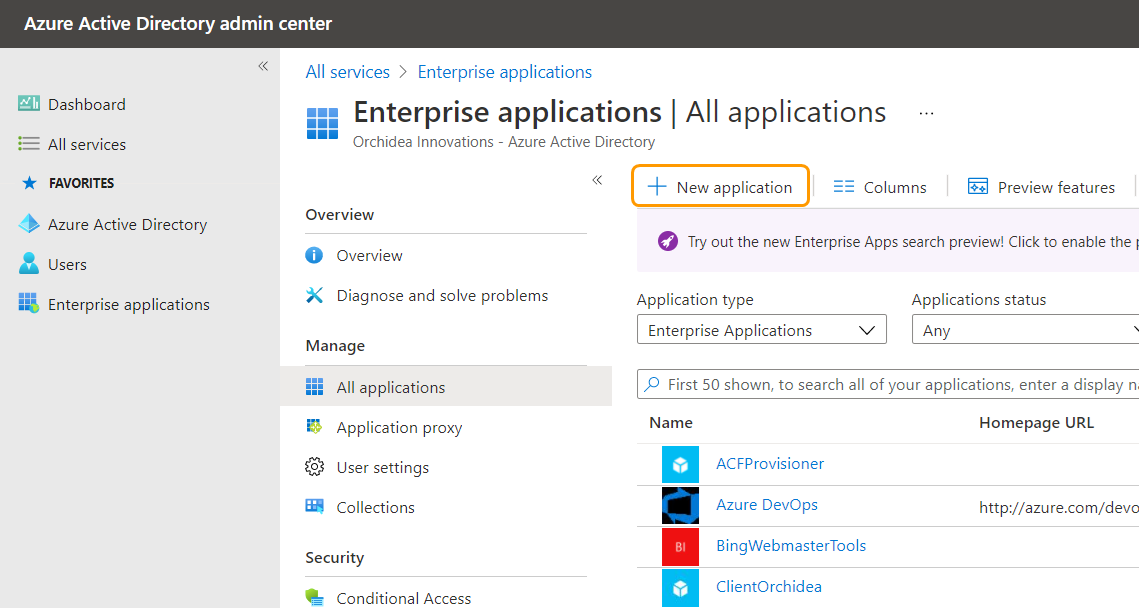
- Then, click + New application
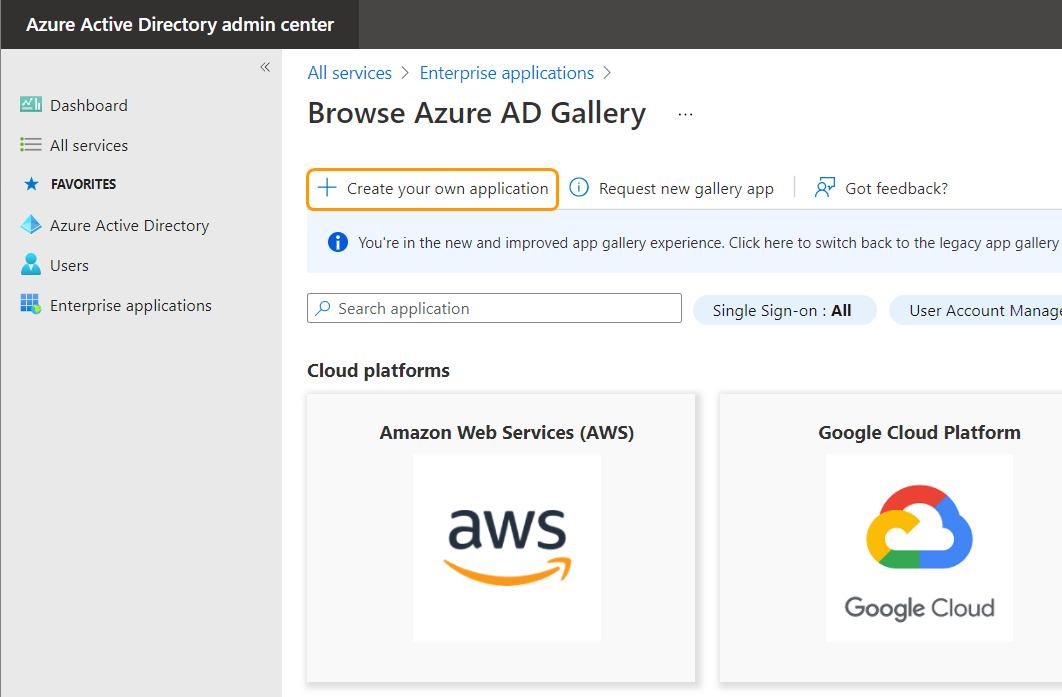
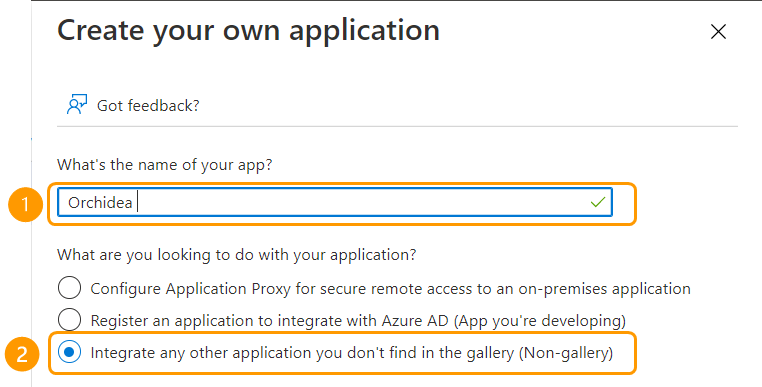
- From the opening window, click +Create your own application.
- Name your App and choose the section Integrate any other application you don't find in the gallery (Non-gallery)
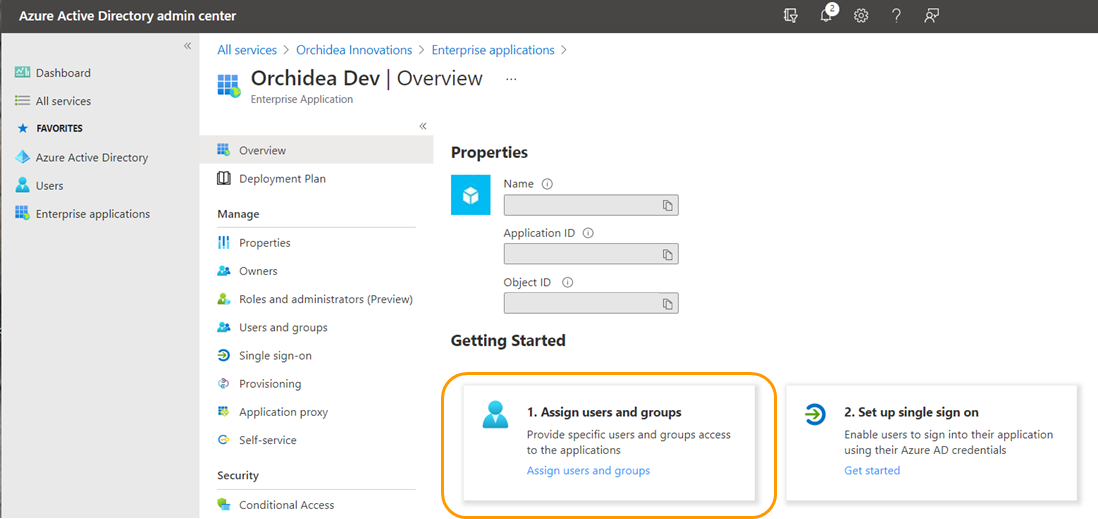
Click Create from at the bottom of the window. The app is ready. - Choose Assign users and groups from the opening window.
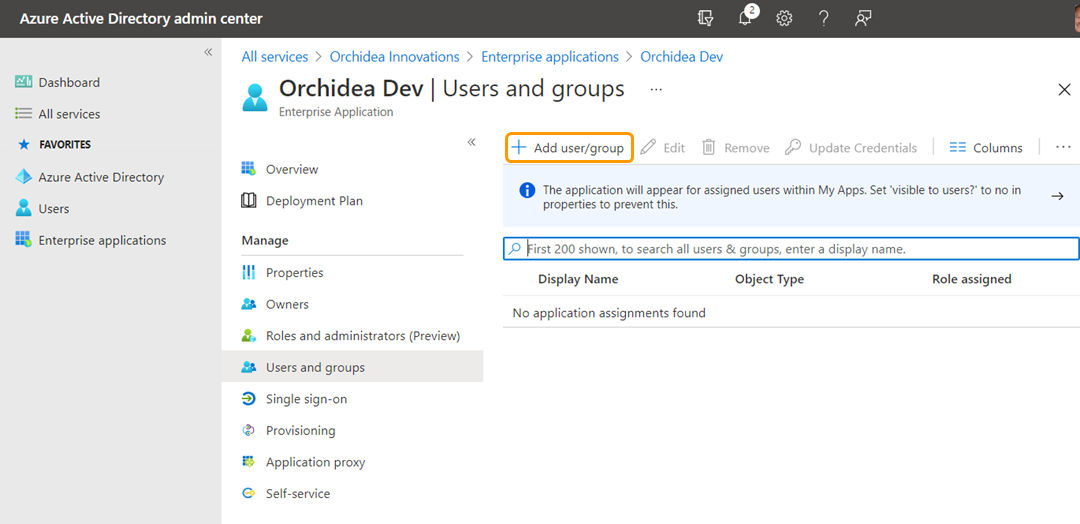
- Click +Add user/group to add users or groups you want to give access to Orchidea.
- Choose None Selected. You can then select the users and groups you want to give access to Orchidea from the window that appears on the right.
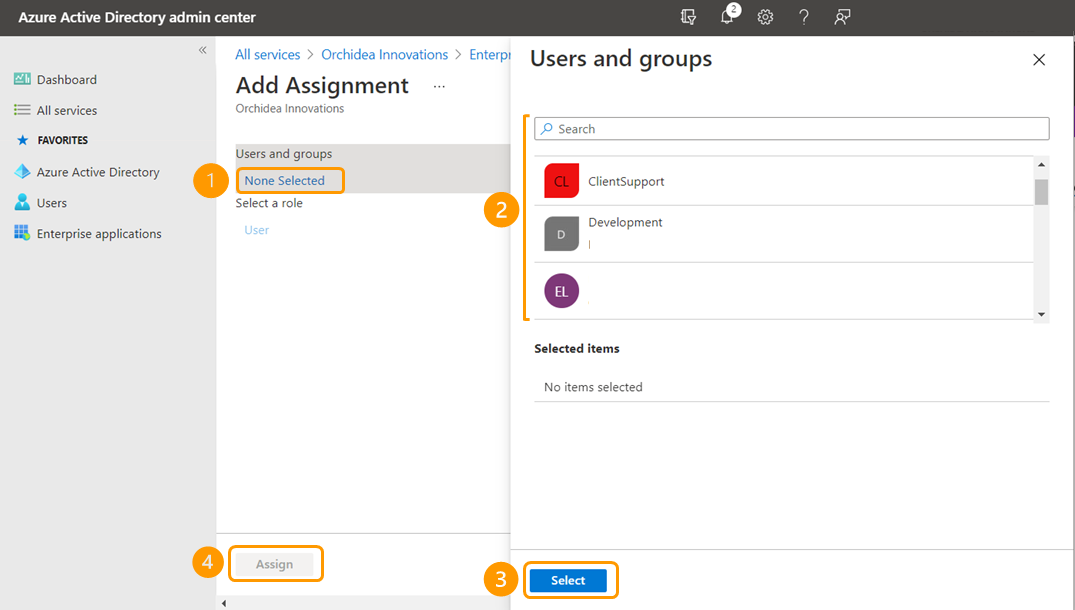
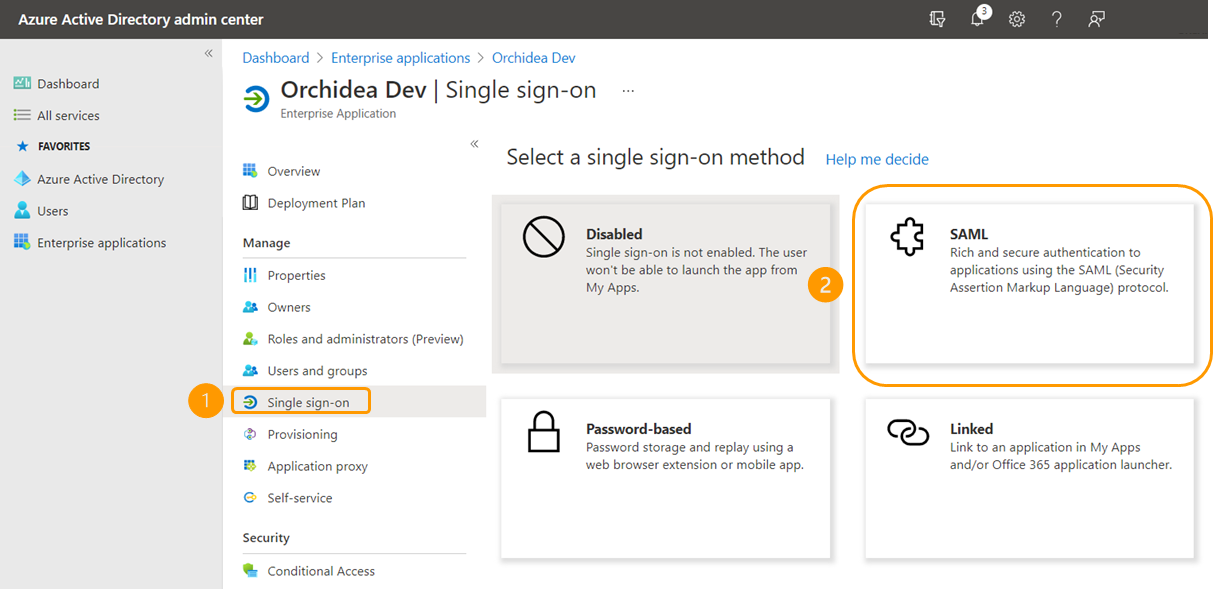
Once you have selected the groups and users you want, click Select and Assign. - Next, select Single sign-on from the inner navigation on the left side, and select SAML from the panels that appear.
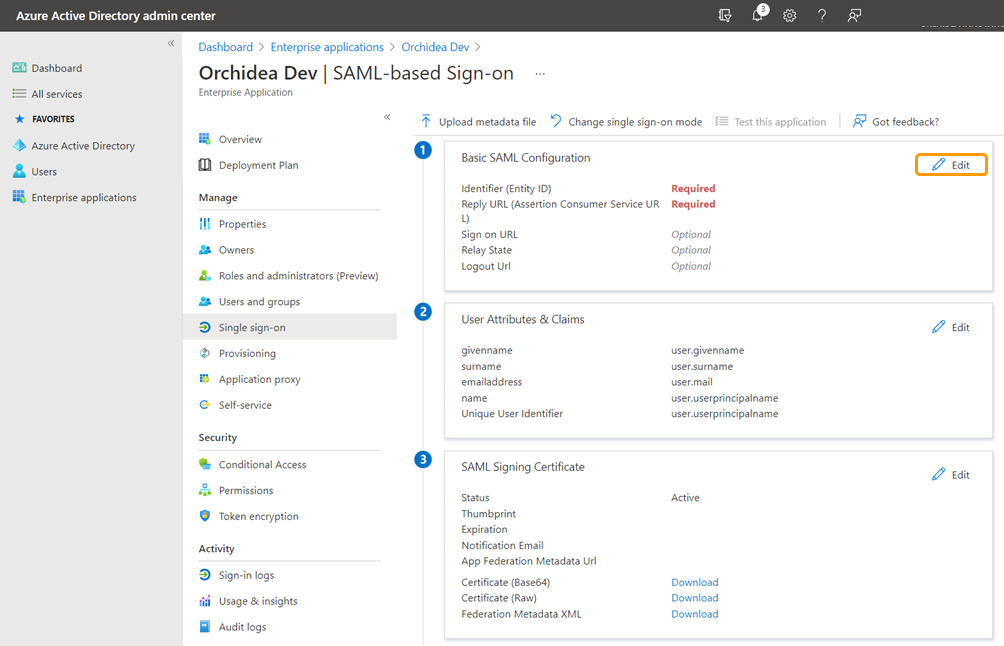
- Click Edit from the section Basic SAML Configuration.
- In the window that appears on the right, fill in the following fields:
- Identifier (Entity ID) - Fill in here "https://orchidea.dev"
- Reply URL (Assertion Consumer Service URL) fill in the temporary response URL here "https://app.orchidea.dev/api/saml/login/" (you can't save the configuration if this field is empty)
- Sign on URL - Fill in the address of the Orchidea homepage you saved in step 1 of this guide.
Finally, click Save to save your changes.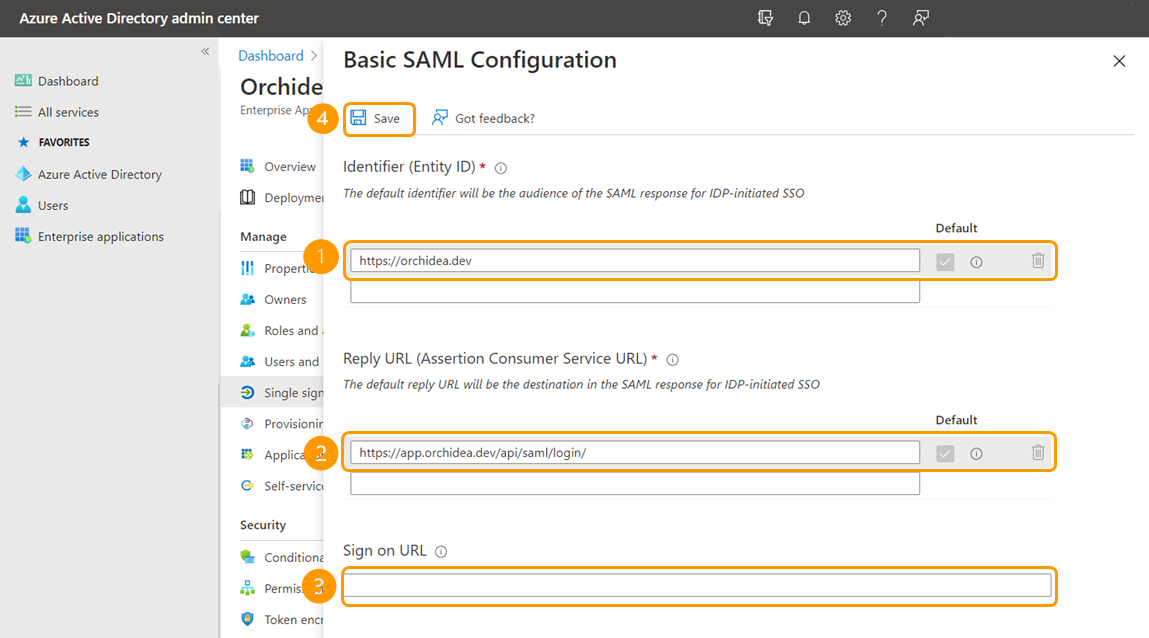
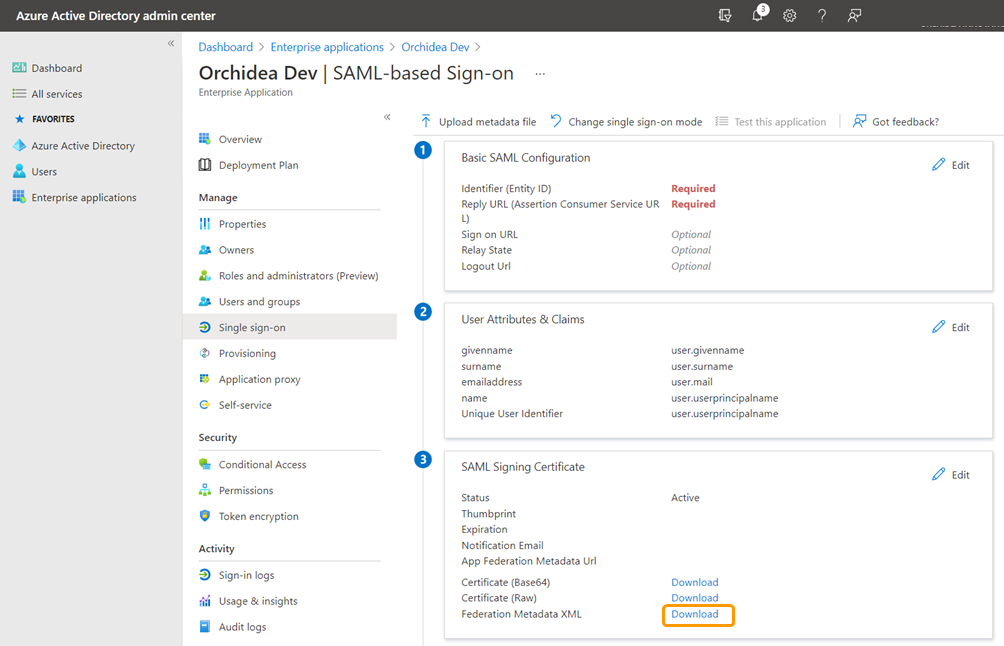
- Next, download the single sign-on metadata of the application you created under the SAML Signing Certificate from Federation Metadata XML - Download.
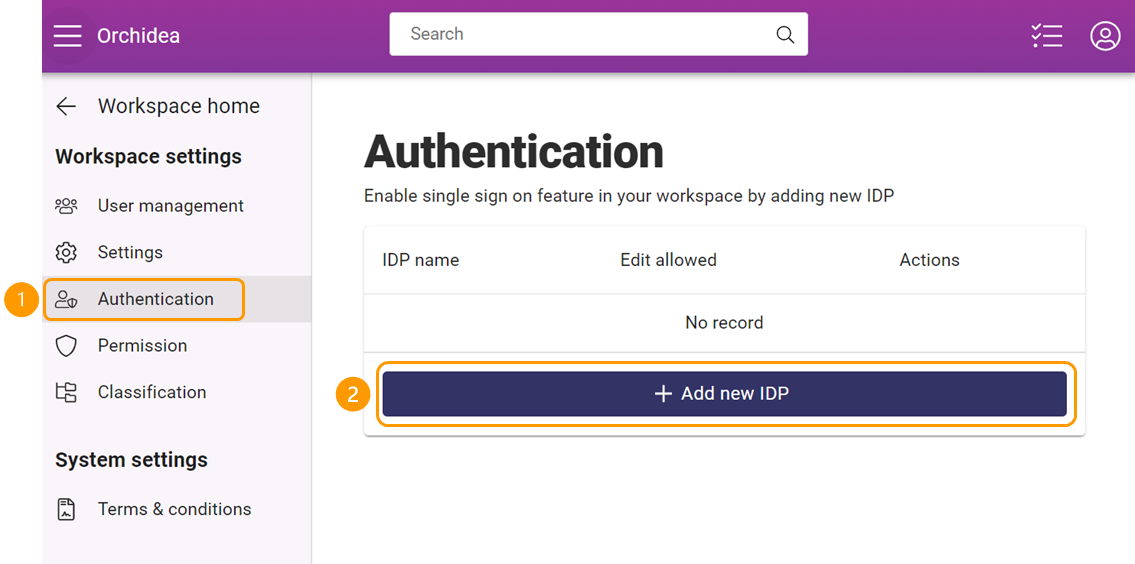
- Navigate to Workspace settings by clicking the sprocket icon in the right top corner of Orchidea.
- Click Authentication on the left-side navigation. Then, click + Add new IDP.
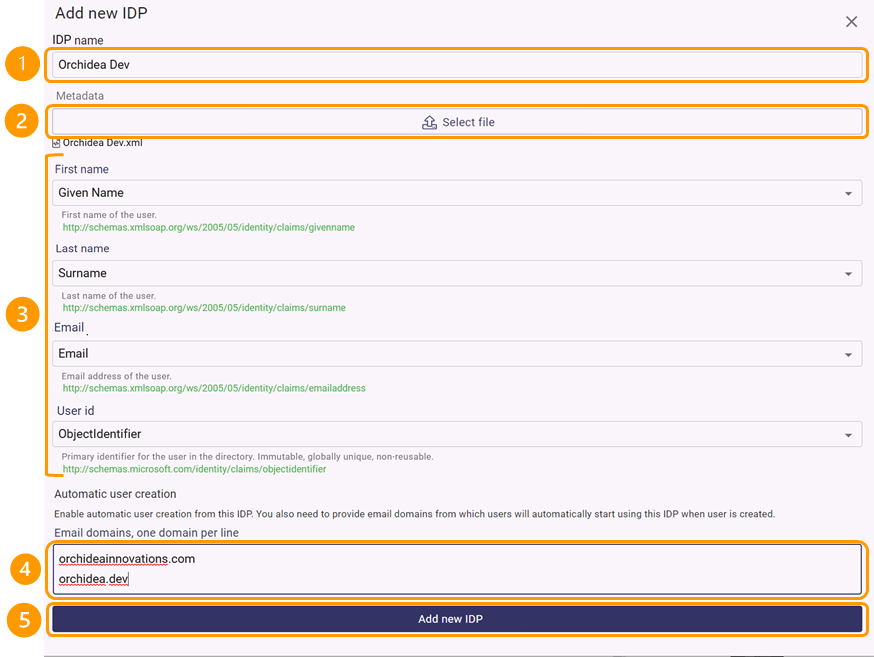
- In the window that appears,
- Fill in the optional name of the IDP in the (1) IDP name field
- Then go to (2) Metadata section and click Select File. Download in the appearing window the single sign-on metadata that you downloaded in step 12.
- After downloading the metadata, ensure that the IDP information for (3) first name, last name, email, and username are linked to the corresponding information in Orchidea.
- If you want a new account to be automatically created for a user using this IDP when they login to Orchidea for the first time, fill in the allowed domains in the section under (4) Automatic User Creation.
- When you are done, finally click (5) Add New IDP at the bottom of the window.
- If you want a new account to be automatically created for a user using this IDP and therefore added domains in 15. d above, you have to add the same domains also to the Join workspace section. Add the same domains to Limit channel managers/users' invitations to domains. Turn on also the setting Allow self-sign-up without invitation from above domains. Here is a link to a related article.

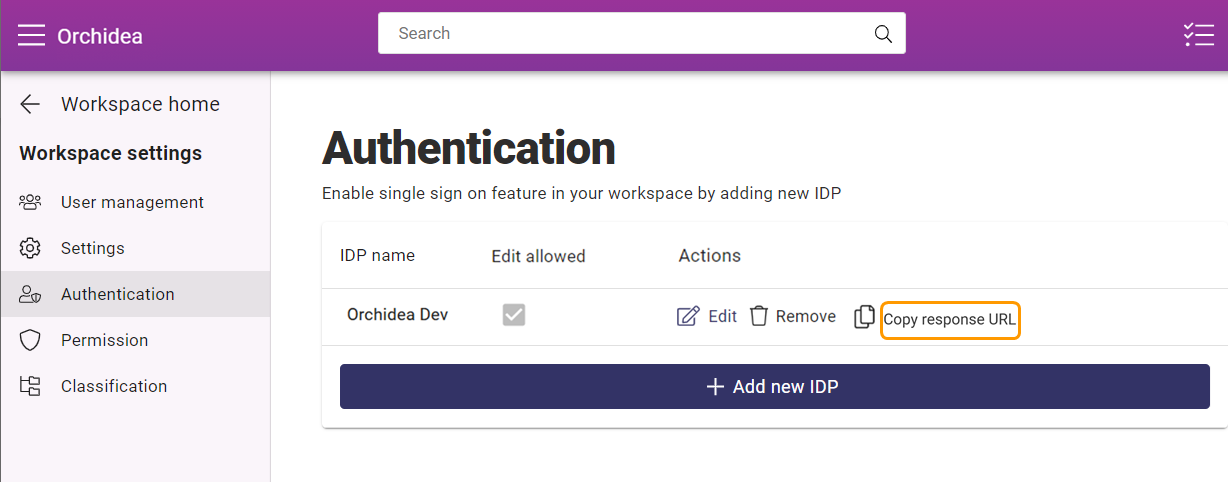
- To copy the response URL, click Copy Response URL from the IDP line you just created.
- Go back to the last view of Azure Active Directory admin center and click Edit from Basic SAML Configuration.

- In the window that appears on the right, replace the temporary Reply URL (Assertion Consumer Service URL) you previously filled out - with the URL you saved in the step 16.
Finally, click Save to save the changes.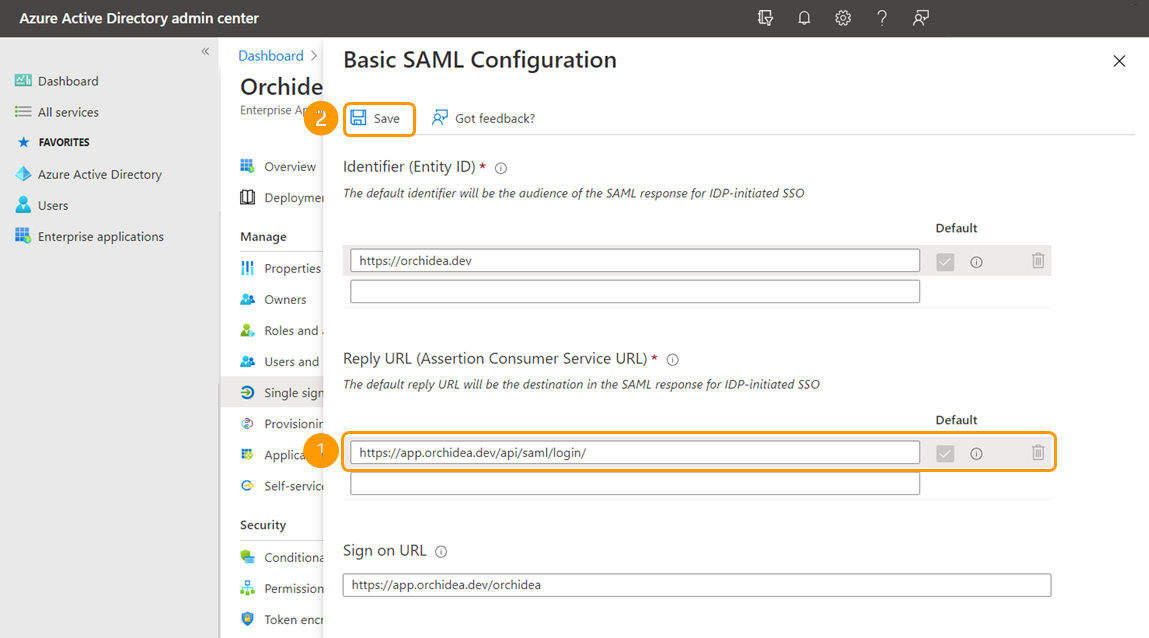
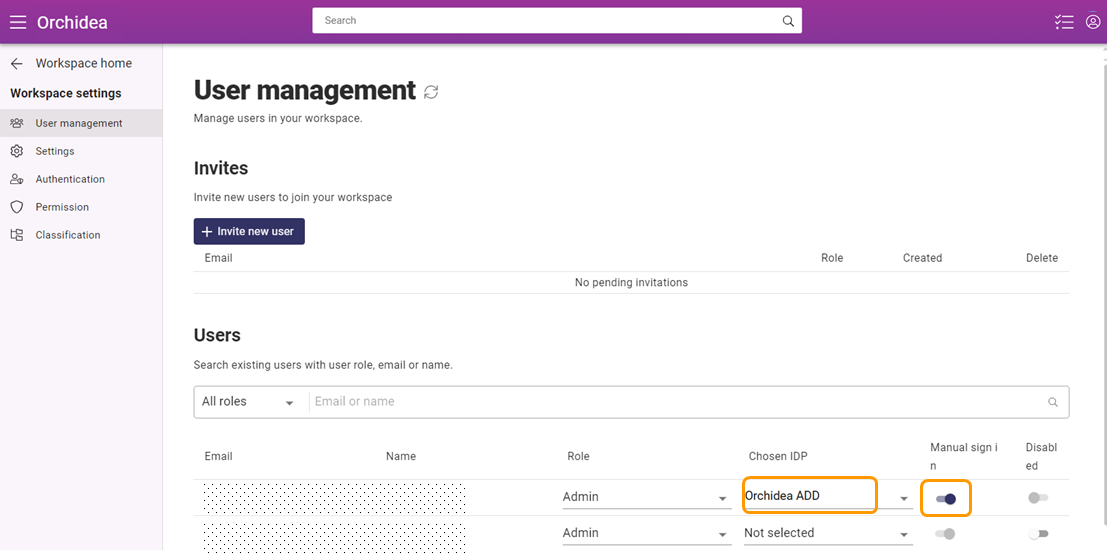
- Next, test the integration with a username that has been given access to Orchidea in step 8. If you are testing with an existing user using password authentication, you must first go to set the user to use the IDP you just created in Admin settings. Turn on for this user also the setting Manual sign in. This allows the user to choose in sign in between single sign-on and password-based sign-in. This is practical if single sign-on has problems.
- If the single sign-on works as expected, you may want to finally turn on the IDP you just created for all the users who previously used password authentication. However, in case of problems in single sign-on, it is recommended that you turn on Manual sign in for at least a few Admin-level accounts.