![Orchidea logo white with orange dot.png]](https://knowledge.orchidea.dev/hs-fs/hubfs/Orchidea%20logo%20white%20with%20orange%20dot.png?width=161&height=51&name=Orchidea%20logo%20white%20with%20orange%20dot.png)
You can join Orchidea in three different ways:
- by invitations, which, depending on the settings selected, all or some user roles can send invitations to selected users by email. If necessary, the sending of invitations can be restricted to the selected email domains.
- by self-sign-up users with an allowed email domain can join the workspace by entering their email on the Orchidea sign-in page.
- Invite links that allow users with a link to join the workspace. You can set an expiry date for the link and restrict its use to selected email domains.
In the workspace settings, you can specify how team members can join the workspace. Joining using single sign-on is also possible in all three modes if enabled.
Email invites and self-signup
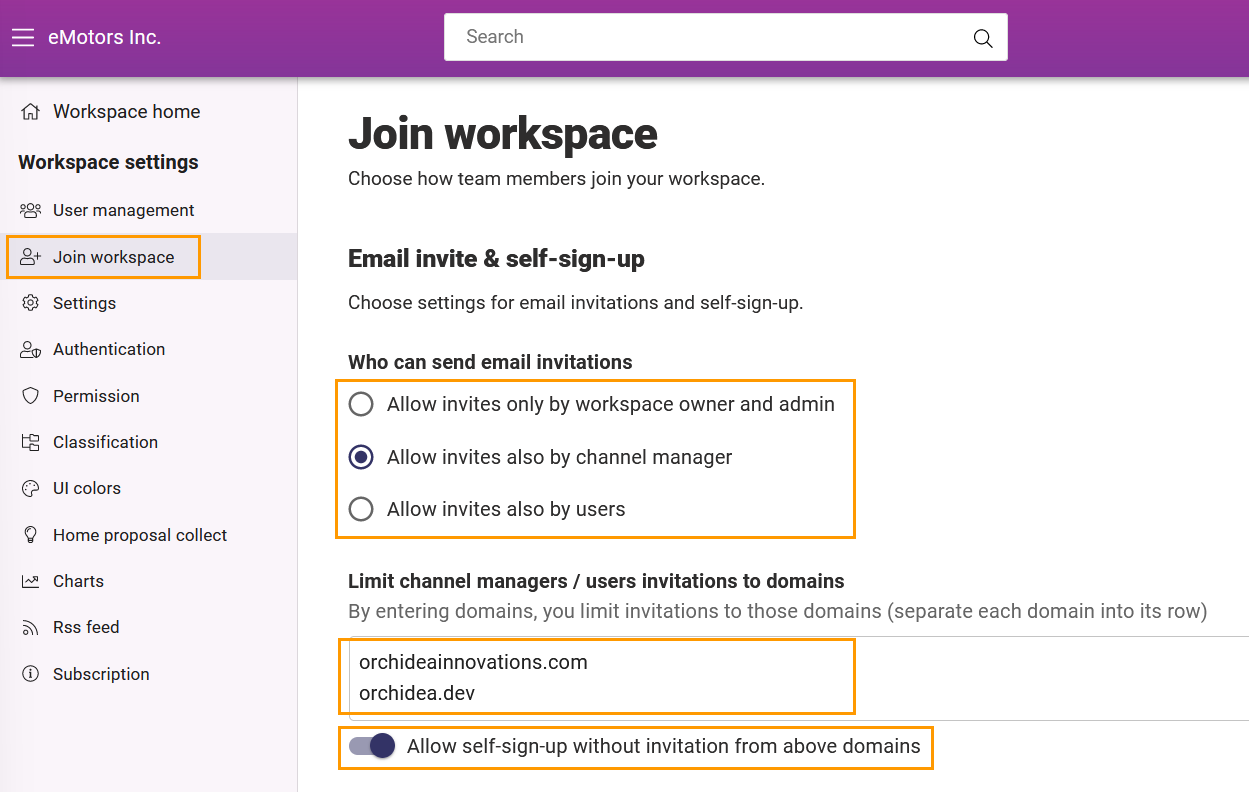
- Go to workspace settings by clicking on the sprocket icon in the top right corner of Orchidea and select Join workspace from the left-hand navigation.
- In the settings, move to Email invite & self-sign-up.
- Under Who can send email invitations, select which role can invite new users
- If you selected Allow invites also by channel managers or Allow invites also by users in Who can send email invitations, you can restrict the invitations of these users to only the selected email domains by adding those domains in Limit channel managers/users invitations to domain.
- If you want to allow self-registration from the above-mentioned email domains, activate the setting Allow self-sign-up without invitation from above domains.
Invite links
Invite links are a more controlled way than self-sign-up to allow team members to join a workspace. You can set an expiry date for invitation links and restrict their use to selected email domains. You can also create multiple links and temporarily disable them if you wish.
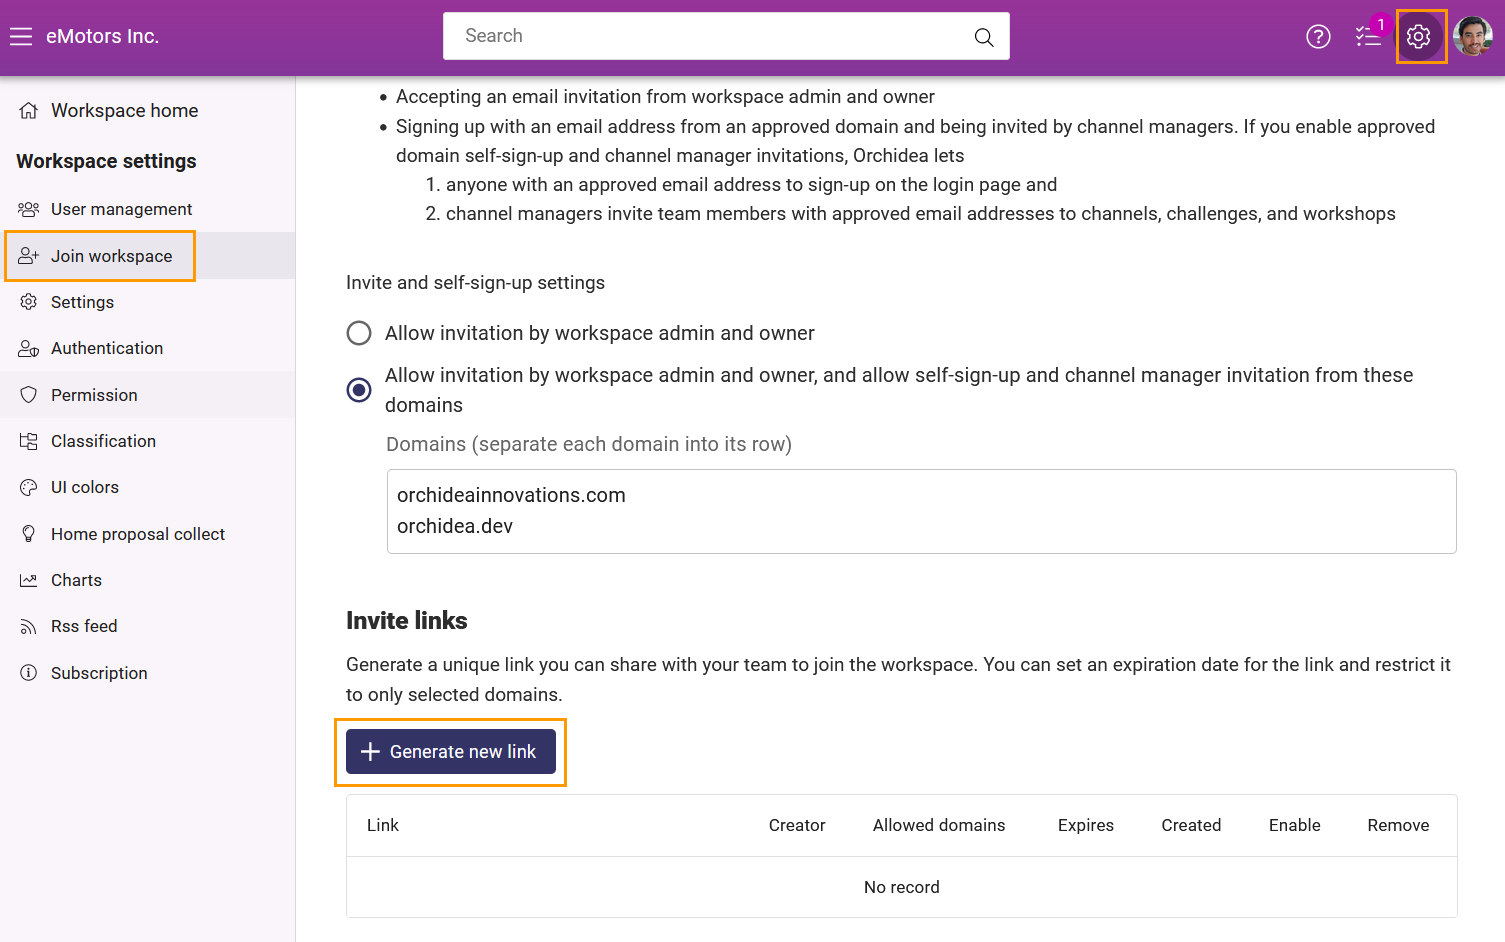
- Go to the workspace settings by clicking on the sprocket icon in the top right corner of Orchidea and select Join workspace from the left-hand navigation.
- Move to Invite links.
- Click + Generate new link.
- You can copy the link by clicking on the link address, which will automatically copy it to the clipboard.

- You can edit the Invite link settings as follows
- Click on the + sign in the Allowed domains column to restrict the link to the selected email domain only
- Click the + sign in the Expires column to set a date and time when the link will be automatically deactivated.
- Click on the toggle switch in the Enable column to temporarily disable the link
- Click on the trash can icon under the Remove column to permanently delete the invitation link.
- Once you are happy with the settings for the Inve link, you can share it with the users of your choice, for example via email, Slack, or Teams.