![Orchidea logo white with orange dot.png]](https://knowledge.orchidea.dev/hs-fs/hubfs/Orchidea%20logo%20white%20with%20orange%20dot.png?width=161&height=51&name=Orchidea%20logo%20white%20with%20orange%20dot.png)
⚠️ You can only create and edit classification trees if you have an Admin or Owner-level role in the workspace.
A classification tree is a system-wide classification. You can create different classification trees to suit your needs and add them to all channels you like. With classification trees, you can manage proposals more effectively since you can search for all ideas with that classification from all the channels you want. A classification tree can also be added to the channel's management forms.
In this classification tree guide, we'll cover:
Creating a classification tree
-
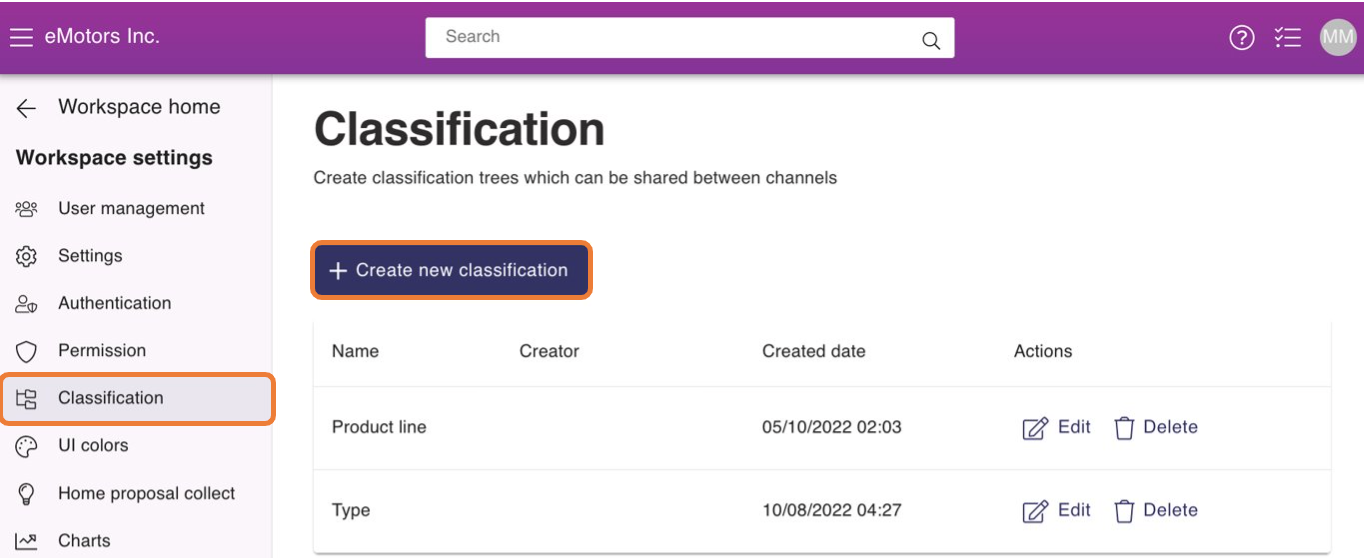
Navigate to Workspace settings by clicking the sprocket icon in the top right corner of Orchidea.
-
Click classification in the left navigation
- To start creating your classification, click + Create a new classification.
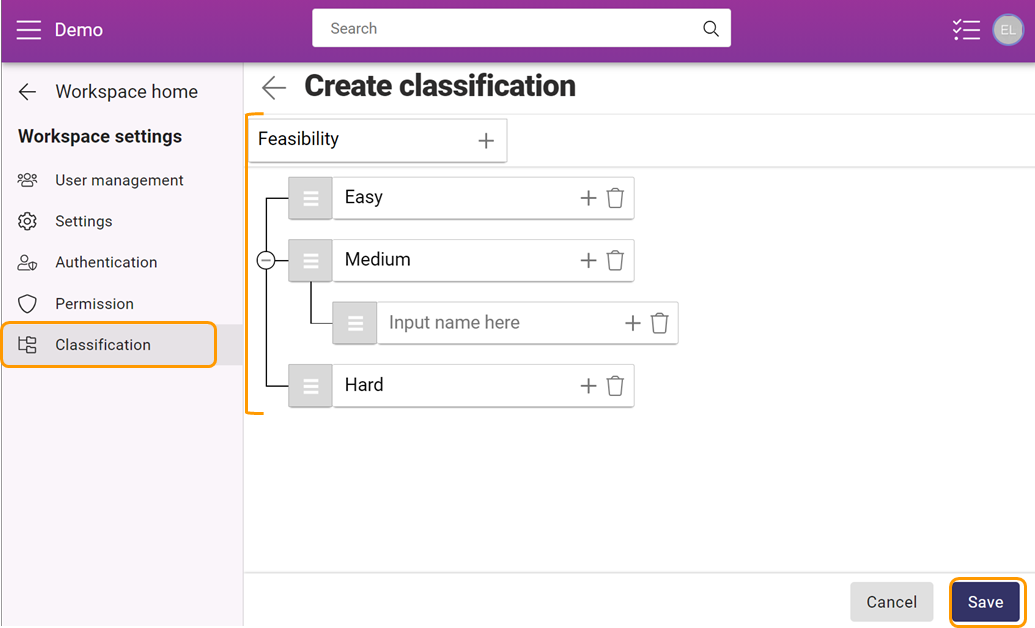
- Add a name to your classification.
- By clicking + sign next to the name, you can add new categories to your classification tree and by clicking + next to the categories you can create subcategories. You can create as many categories as you want, and you can delete them by clicking
 .
. - Name the categories and finally press Save.
- You can also edit the existing categories by clicking
 or delete them by pressing
Adding a classification to a channel
You can add the classification to any form you want, on any channel, challenge, or workshop. When you have created one, you can add it to channels, challenges, and workshops by following these steps:
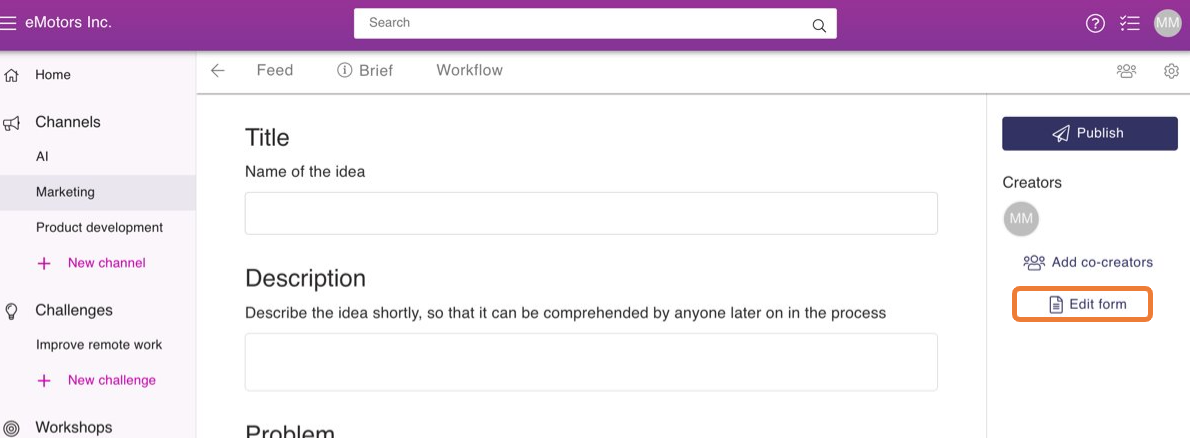
- Go to the channel or challenge where you want to add the classification.
- Click + Create proposal.
- Press Edit form on the right.
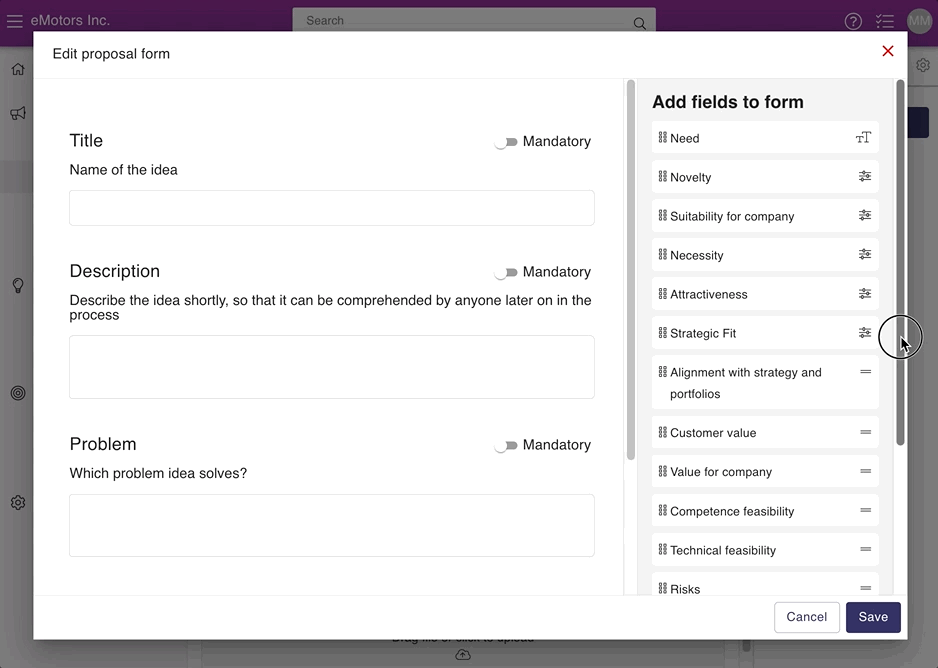
- Add the classification to a form from the list on the right by dragging it to the form with your cursor. If you can't find it, click + Add new field, select classification tree as a type, add a name, and find the classification you want. Finally, click Create and save the changes you made.
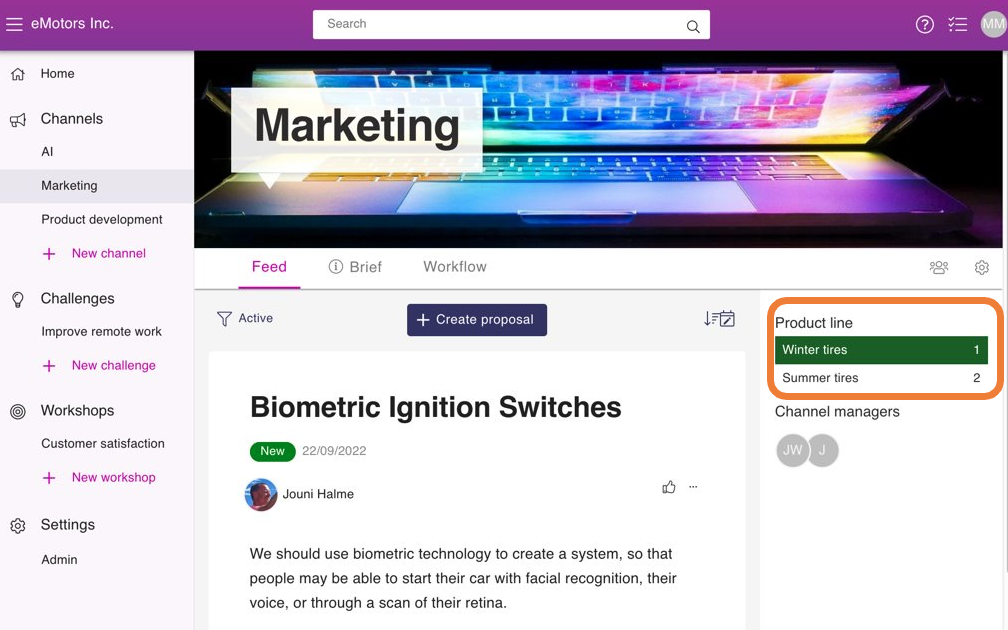
Add a classification filter to the channel feed
By adding the classification tree on the right side of your channel, you can filter the proposals you want. To add the classification, follow the next steps:
- Go to the channel of your choice.
- Press
 in the top right corner of the channel.
 - In the appearing menu, click Settings.
- Press Set classification.

- Select the classification tree of your choice.
- To save the changes, click Submit. It will pop up on the right side of the channel. By pressing the classification of your choice, it will only show the proposals that have been submitted to said category on your feed. Here's how it will show up on your channel:
💡 Make the classification form mandatory in the proposal submission form to ensure that each idea is classified.