![Orchidea logo white with orange dot.png]](https://knowledge.orchidea.dev/hs-fs/hubfs/Orchidea%20logo%20white%20with%20orange%20dot.png?width=161&height=51&name=Orchidea%20logo%20white%20with%20orange%20dot.png)
- To create a new workshop, click the + New workshop link on the left navigation of Orchidea.
- Select the template you want. They work on the same principle but differ in the steps of the workshop.

- Enter the Problem statement and name of the workshop in the following window. If you plan to use AI features in the workshop, write the problem statement so that AI receives enough information about the topic. We suggest describing the problem statement with "How might we..." questions. You can learn more about the problem statement formulation in your blog post: Why innovation challenge design is important and how to do it?
- After creating the workshop, you can add more context to the topic, such as your industry, desired ideas, or limitations.
- Enter the workshop name. We recommend 2 - 3 word long workshop names. The workshop name is shown in the left navigation, and users can enter the workshop by clicking it.

- Set the visibility to Open or Private based on your needs.
- If you create a public workshop, it will be immediately visible to all workspace members. If you want to prepare the workshop in peace, create a private workshop. You can change this option at any time in the Workshop settings.
- We generally recommend that workshops be held privately also during the participation phase, as they typically involve only a small proportion of all Orchidea users. Making them visible to everyone in the left-hand navigation may confuse users.
- Click Submit to create the workshop.
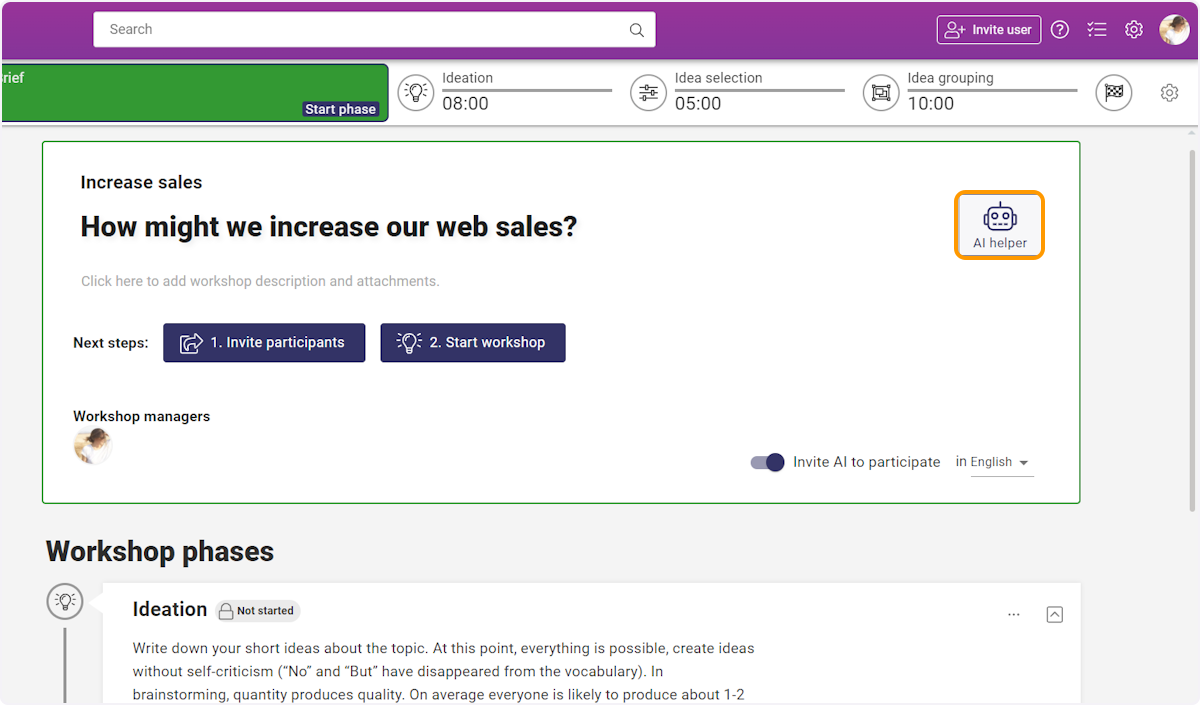
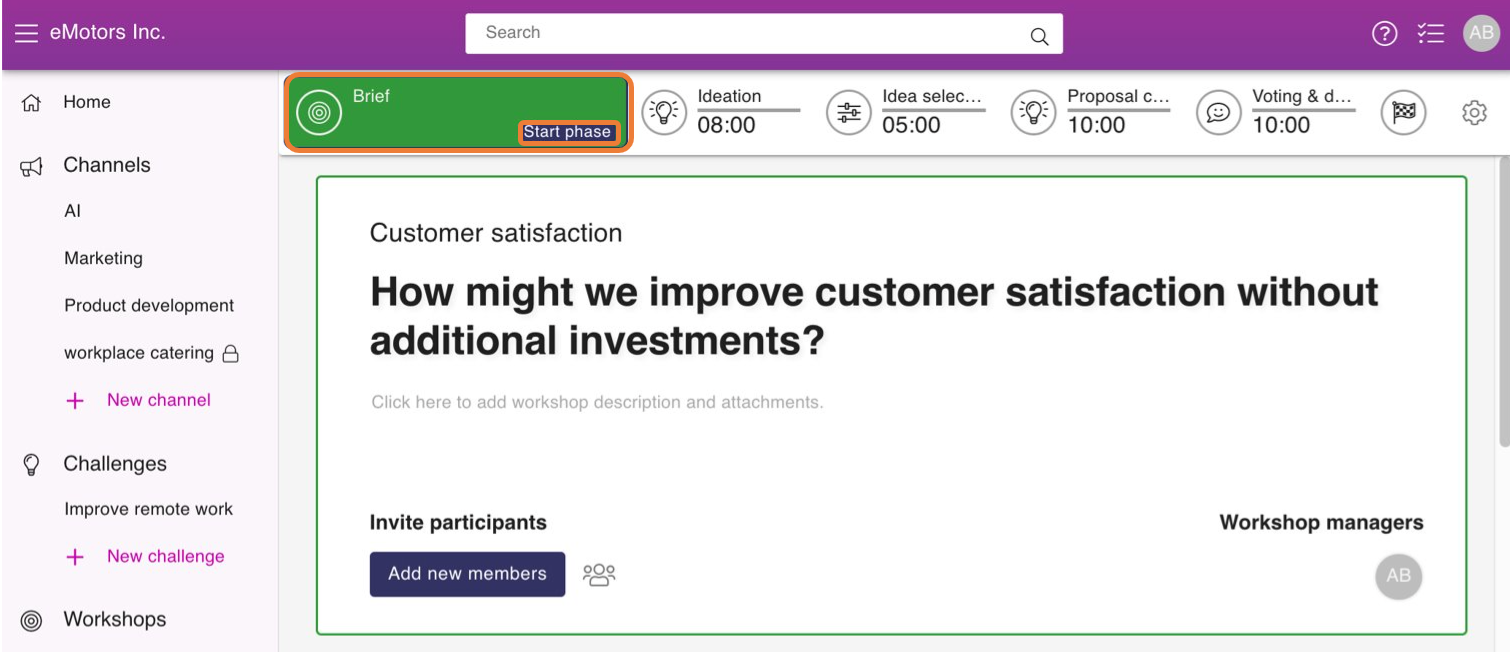
- After workshop creation, you will land at the brief phase of the workshop, where you can
- Craft variations of your problem statement with AI.
- Add more context to the topic, like your industry, desired type of ideas, or limitations
- Toggle AI participation off
- Invite participants to the workshop
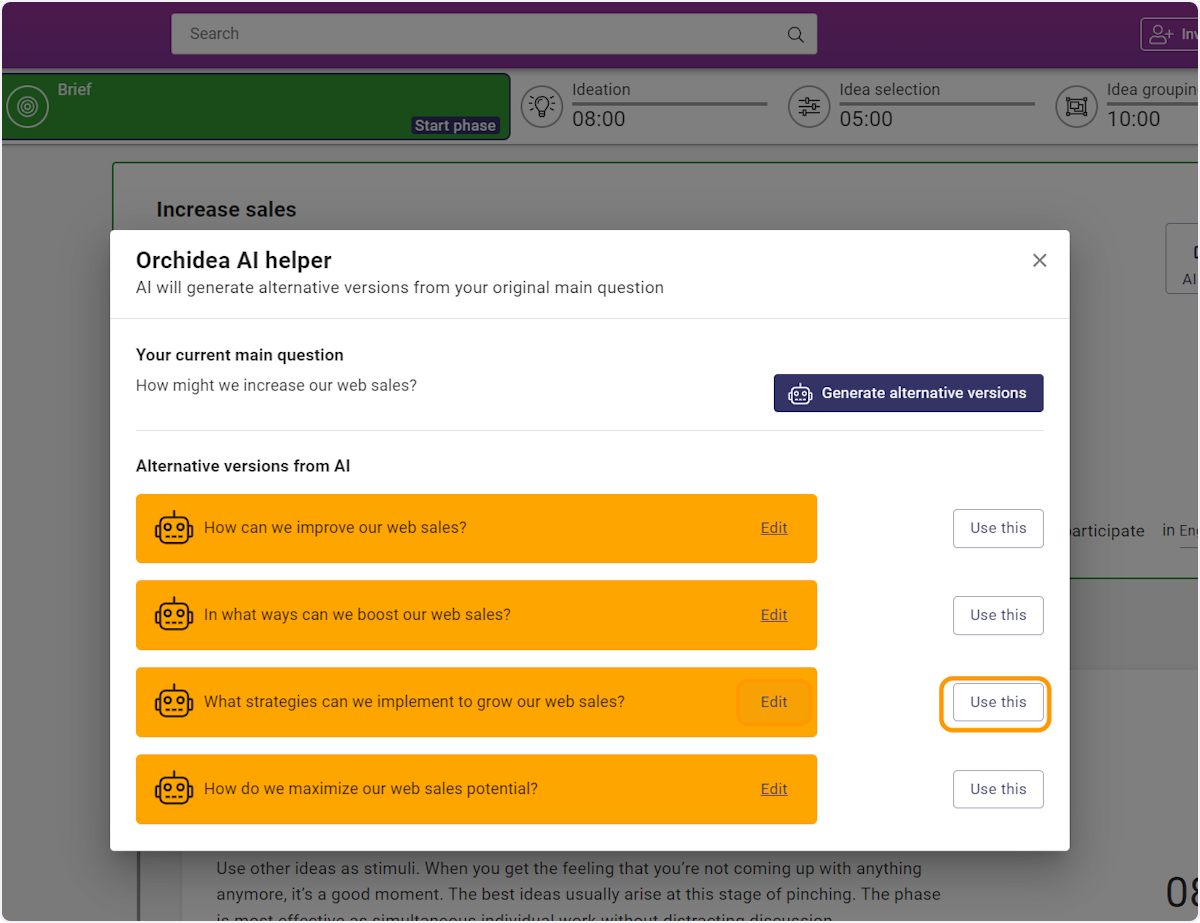
- You can create variations of your problem statement with AI. Click on AI helper on the right.
Then, click on Generate alternative versions on the opening view. The AI will create options for your how might we question, that you can click on edit to adjust and change your problem statement by clicking Use this.
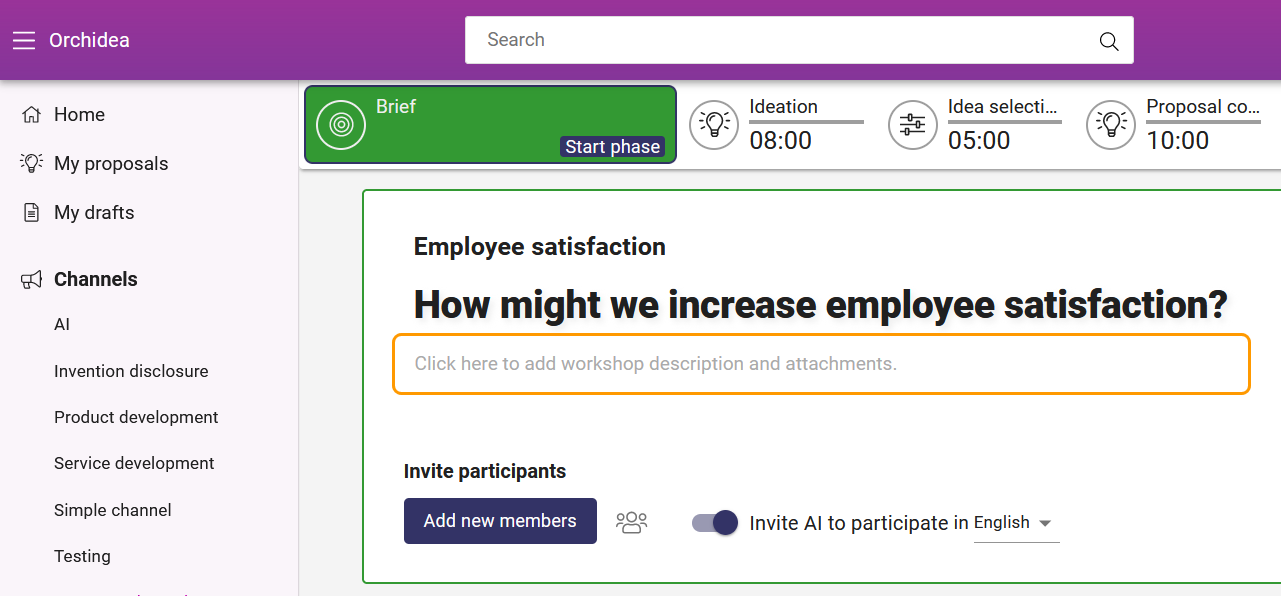
- You can add more context to the topic by clicking on the box below the problem statement. Click Submit to save the additional description and attachments. Remember that AI will create more accurate ideas if you provide context.
- AI will help you in the workshop by default, but you can turn AI off or modify AI settings by clicking AI settings. AI will participate by default in Orchidea's user interface language, but you can select another language in AI settings.

- Next, you should decide how to invite your participants to the workshop.
- If your workshop is public and your participants already have access to Orchidea, you can ask them to log in and find the workshop under the Workshops heading in the left navigation.
- If your workshop is private or your participants do not have access to Orchidea, you must invite them by clicking the Add new members button.

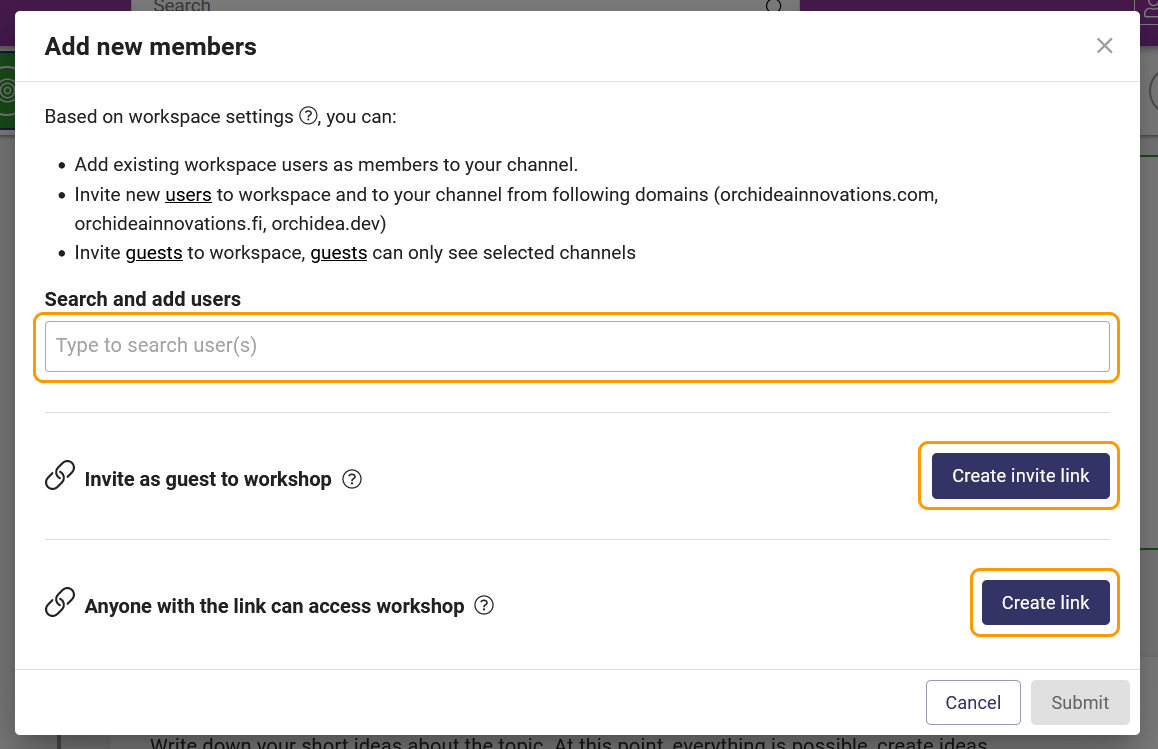
- In the appearing window, you have three optional ways to invite participants
- You can fill in the names or email addresses of the participants in the Search and add users field. If you have multiple email addresses in their own rows for example in the text of an Excel file, you can copy and paste them all at once to the Search and add users field. When you have filled in all names and email addresses, click Submit in the right bottom corner of the modal window.
- You can invite guests to the workshop by clicking the Create invite link button. Guests need to register and provide a password and they will have access only to this workshop in your Orchidea. Once you have created the invite link, you can copy it and distribute it to your target audience by e.g. email, Slack, Microsoft Teams, or by publishing it on a web page. If you disable the invite link, those guests who registered using it still have access to the channel.
- You can create a link that anyone can use to access the workshop by clicking the Create link button. Participants accessing the workshop with the link are by default anonymous visitors and they do not need to sign in. Once you have created the invite link, you can copy it and distribute it to your target audience by e.g. email, Slack, Microsoft Teams, or by publishing it on a web page. If you disable the invite link, all visitors using it to access your channel will lose their access immediately.
- In the appearing window, you have three optional ways to invite participants
- To start the workshop, click Start phase in the bottom right corner of the Brief phase.
⚠️ You can stop the workshop timer by hovering over the running timer and clicking the appearing pause button ⏸️.
Edit workshop settings
You can edit the workshop settings like workshop phase length, the maximum number of ideas selected in the Idea selection phase, and the maximum number of likes and other reactions in the Voting phase:
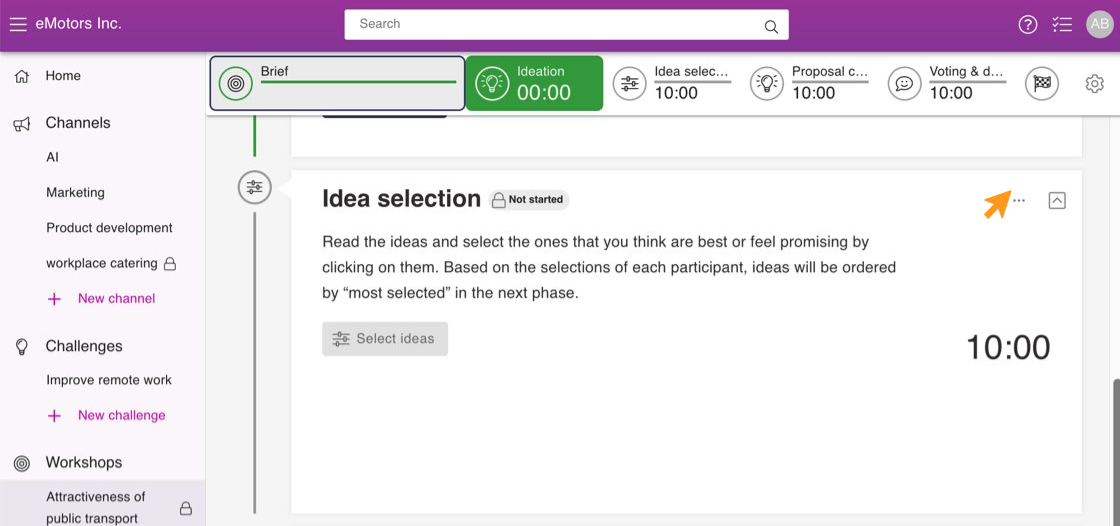
- You can change the length of a phase by clicking it in the top navigation of the workshop. To make a phase longer, press +, and to make it shorter, press—next to the time.
- Change the General workshop settings. Go to any ongoing or completed phase in the workshop and press the
 button in the top right corner of the phase in the top navigation. In the view that opens, select the Settings tab. You can define
- The maximum number of proposals that participants can choose in the Idea selection phase and
- The maximum number of reactions that participants can choose in the Voting phase
- If necessary, you can change the instructions or the names of the different phases of the workshop. To change the name or instructions follow these steps:
- Go to the phase you want to change on Brief tab.
- Press the
%20asetukset.png?width=24&height=7&name=3%20pistett%C3%A4%20(kolme)%20asetukset.png) button in the top right corner of the phase.
button in the top right corner of the phase. - From the menu that opens, press Edit Name and Instructions.
- Click Submit to save your changes.