![Orchidea logo white with orange dot.png]](https://knowledge.orchidea.dev/hs-fs/hubfs/Orchidea%20logo%20white%20with%20orange%20dot.png?width=161&height=51&name=Orchidea%20logo%20white%20with%20orange%20dot.png)
1. Create a workshop and invite participants
Before running the workshop, you need to create it and invite participants
💡Read more about workshop creation: Creating a workshop
2. Brief the workshop topic to the participants
Brief the problem statement and the goal of the workshop to the participants. Participants may also ask questions.
💡 You can send workshop participants a link to this article: Guide for participating in a workshop
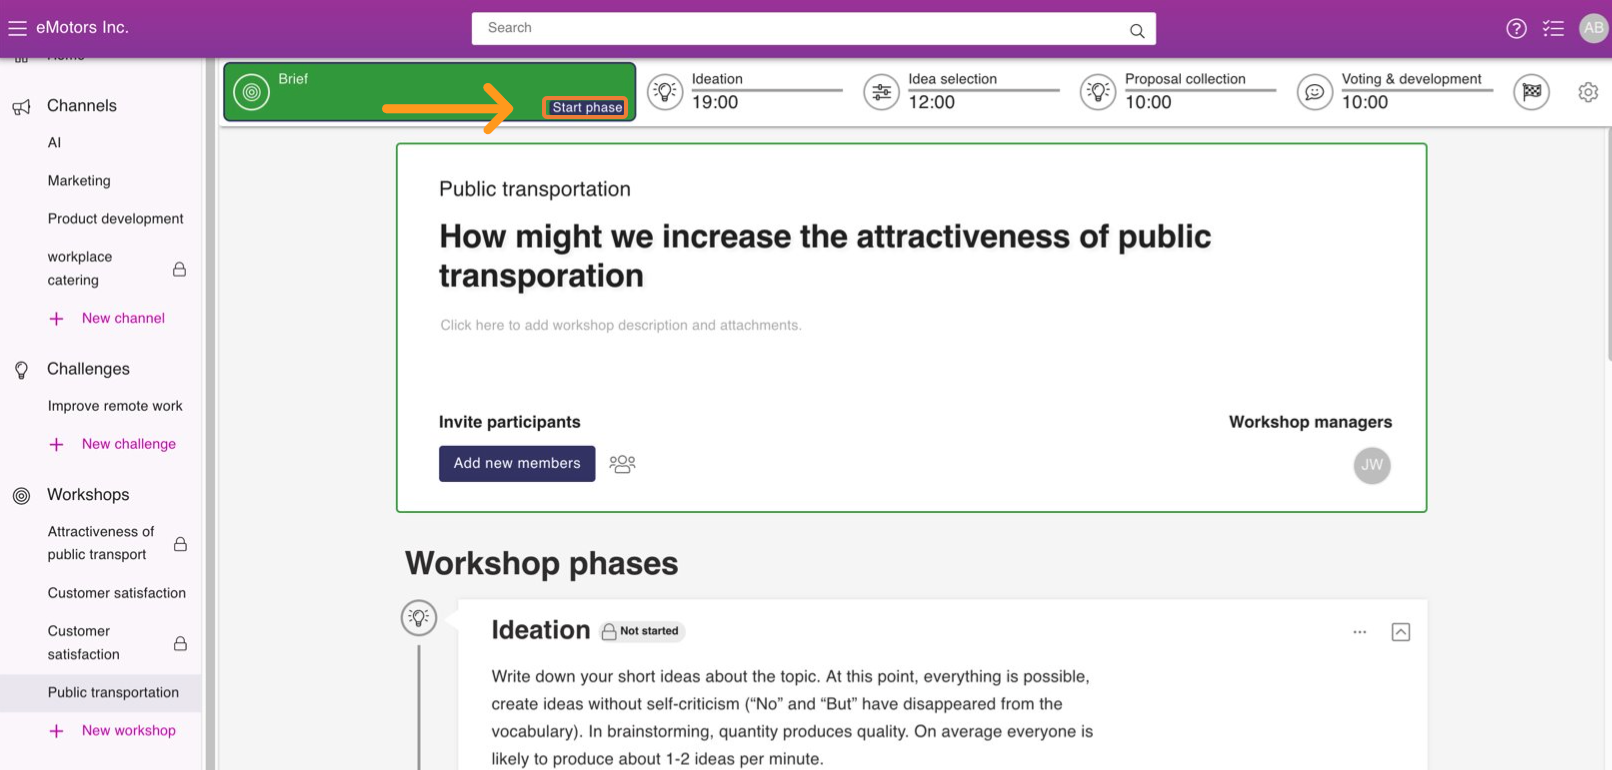
3. Start your workshop
You can start your workshop by pressing on the Start phase in the lower right corner of the green Brief button.
The next steps vary on which template you choose for the workshop.
4. Ideation phase
The goal of the Ideation phase is to get the participants to submit as many ideas as possible, which serve as a starting point for the more thorough proposals to be produced later. If you invite AI to participate it will generate ideas for your topic among human participants. AI ideas have a robot face in their top right corner and the user initials are AI.
Here are the principles of ideation that you can tell the participants:
- No self-criticism, the words “No” and “But” have disappeared from the vocabulary. All ideas are appreciated, so don’t leave out ideas that you think are not good enough.
- Write down a lot of ideas. In ideation quantity produces quality. First participants will write down familiar ideas -> this leads to pinching -> thoughts are forced to new areas -> totally new unique ideas are created
- Consciously produce funny, unusual, and even radical ideas as seeds for new ideas.
- Use existing ideas as stimuli for new thoughts.
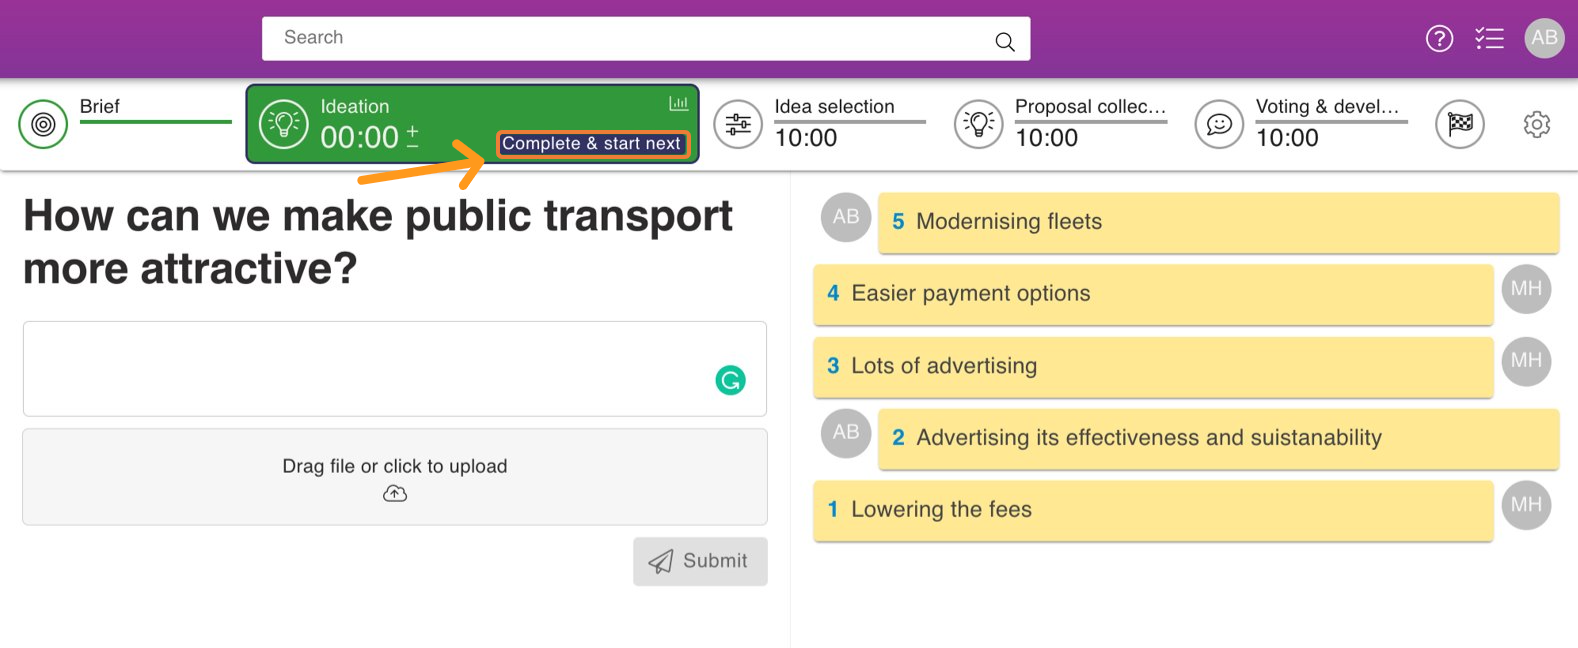
⚠️ Be aware that running out of time doesn’t end the phase automatically. End the phase and start the next by pressing the Complete & start next button. Tell participants out loud what you're doing.
💡If necessary, adjust the duration of the phase before starting. You can modify it also during the phase. More about doing modifications here: Creating a workshop
5. Idea selection
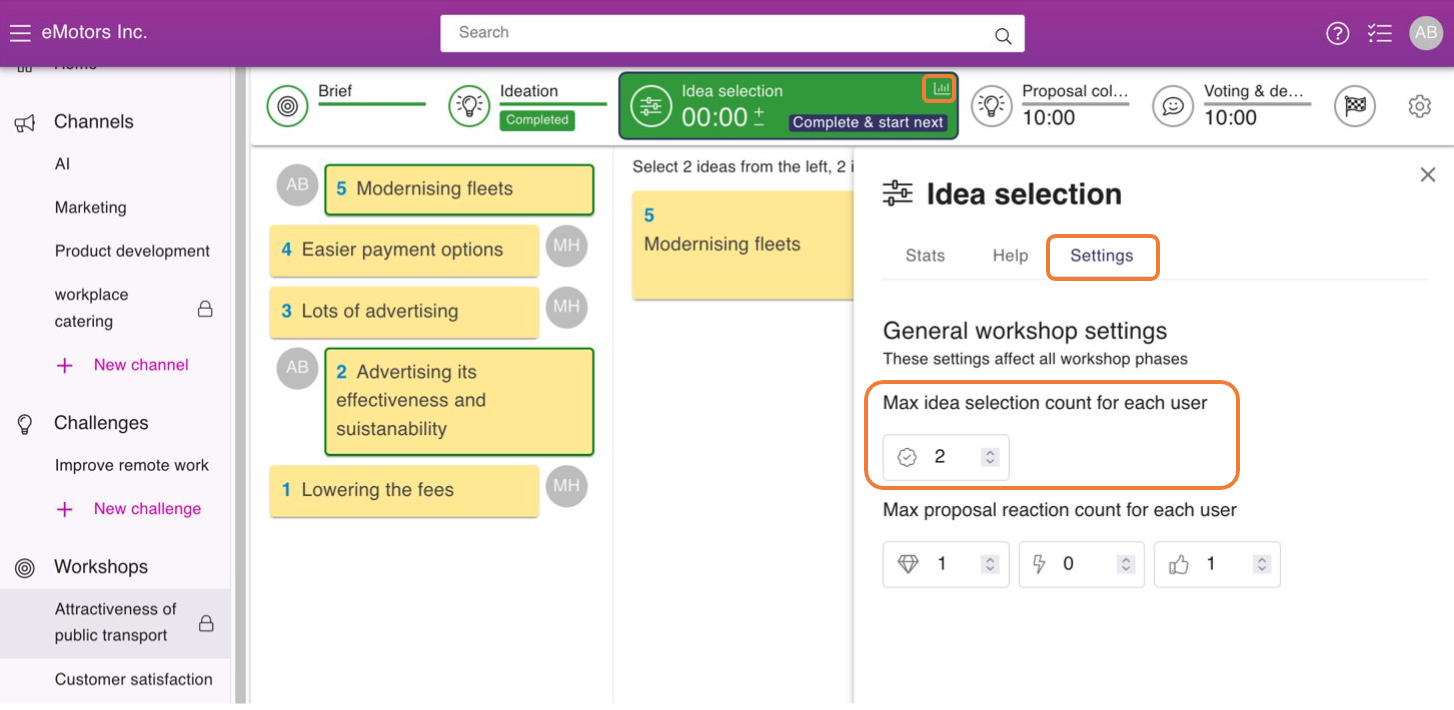
In the Idea selection phase, the goal is to get participants to choose the ideas they consider best. The participants' choices are presented in the order of popularity in the following Proposal collection phase. You can set the maximum number of ideas each participant can select in the workshop settings.
Here are some tips for success:
- Instruct the participants to choose the best ideas by clicking on them.
- Explain that the participants’ choices will form the order of popularity which is revealed in the next phase.
- The order of popularity highlights the ideas in which participants see the greatest potential. This will help participants to identify which of their ideas should be built into more thorough proposal in the next phase.
- Change the setting to how many ideas each participant can choose. A good ratio is 1: 5, i.e. you can choose 10 of the 50 ideas produced. You can change the maximum idea selection count for participants by pressing
 and opening the Settings tab.
 - Follow the number of selections per participant in the Stats tab and give more time if necessary or end the phase earlier if participants are ready.
- Finally, press the Complete & start next button to allow participants to move on to the next phase. Tell participants out loud what you're doing.
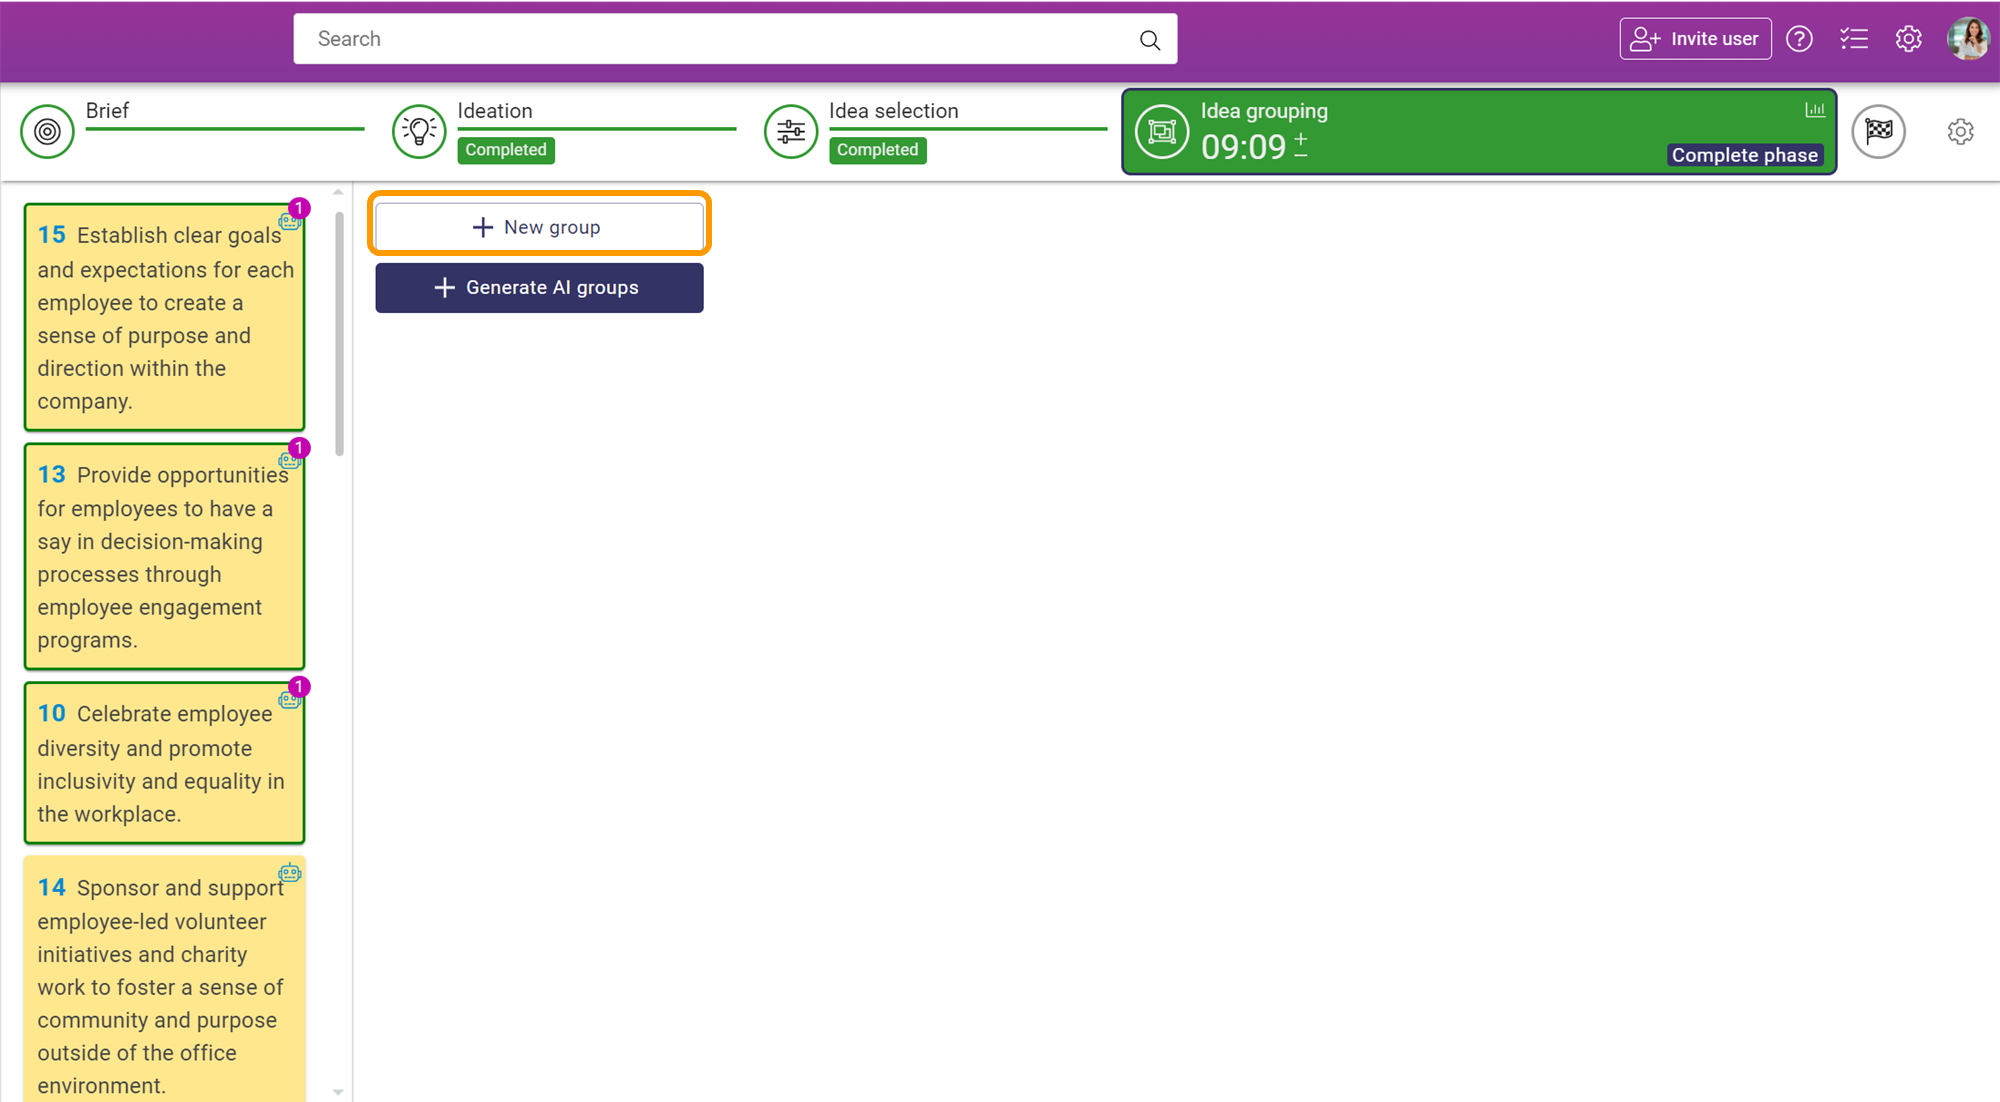
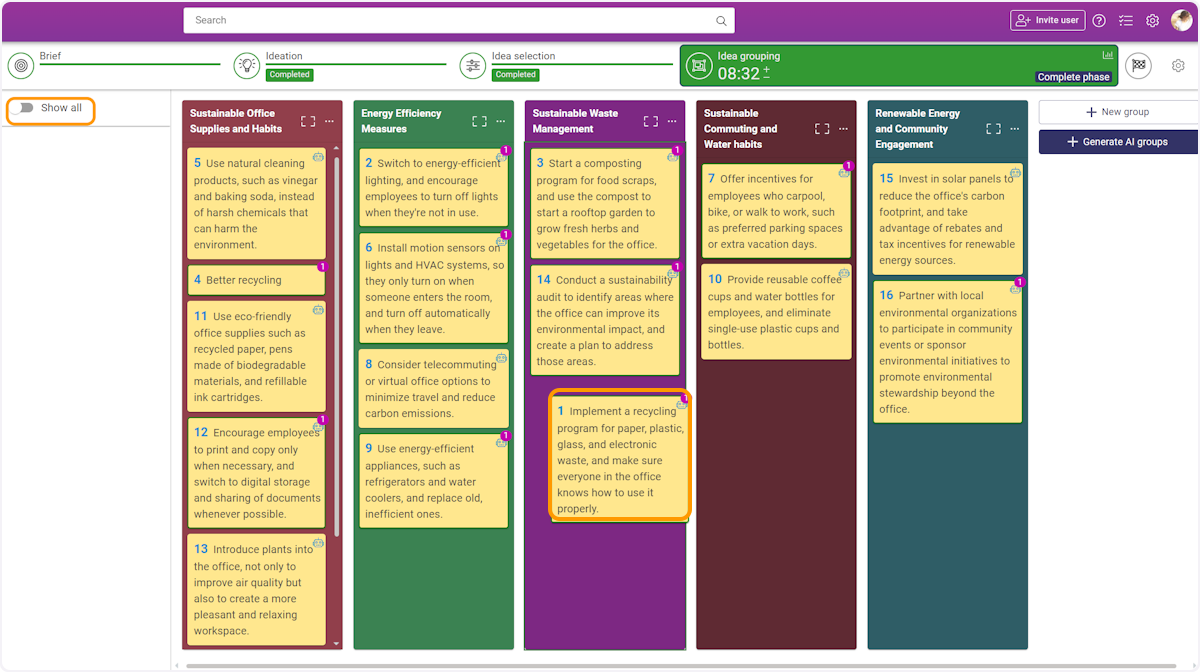
6. Idea grouping
In shared idea grouping, participants can create groups and drag and drop the ideas between them. The participants can see in real-time, where others are moving the ideas into.
1. Start creating your own groups by clicking + New group. You can add as many groups as you want.
2. By clicking the three dots icon in the upper right corner of the group, you can find options to edit or delete a group. By clicking Edit, you can change the group name and the background color.
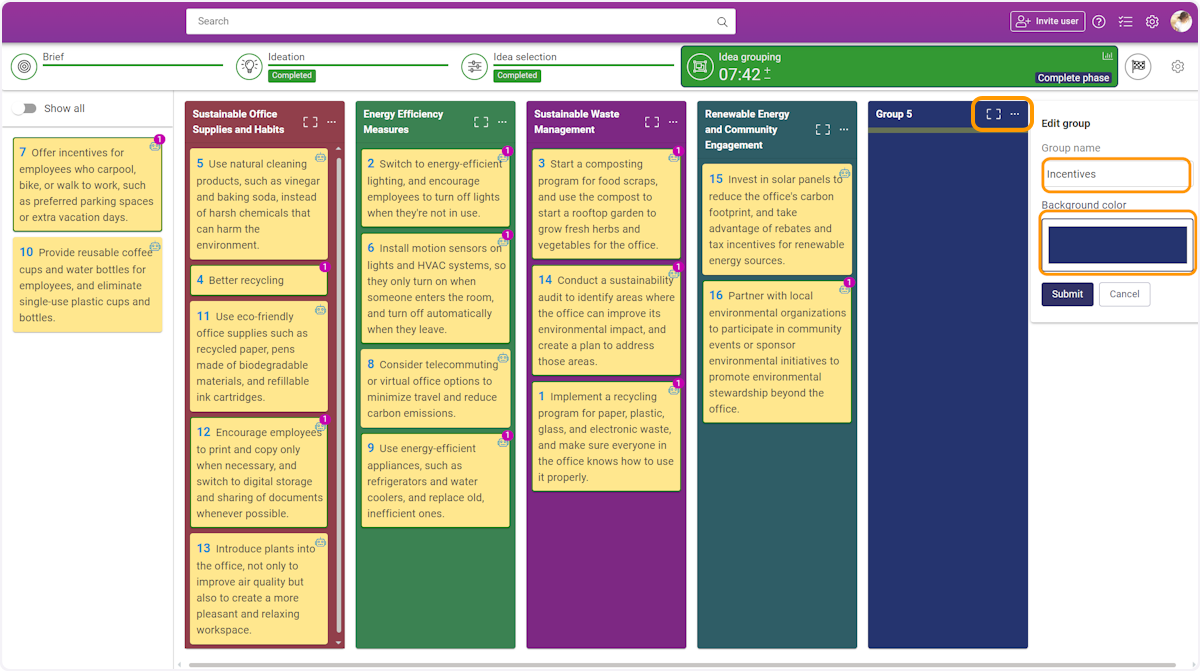
3. Drag and drop ideas between the groups. All the participants will see the ideas moving between the groups in real time. By clicking Show all, you'll see also the ideas that haven't been grouped yet, and you can drag them into groups if you want, or create new ones.
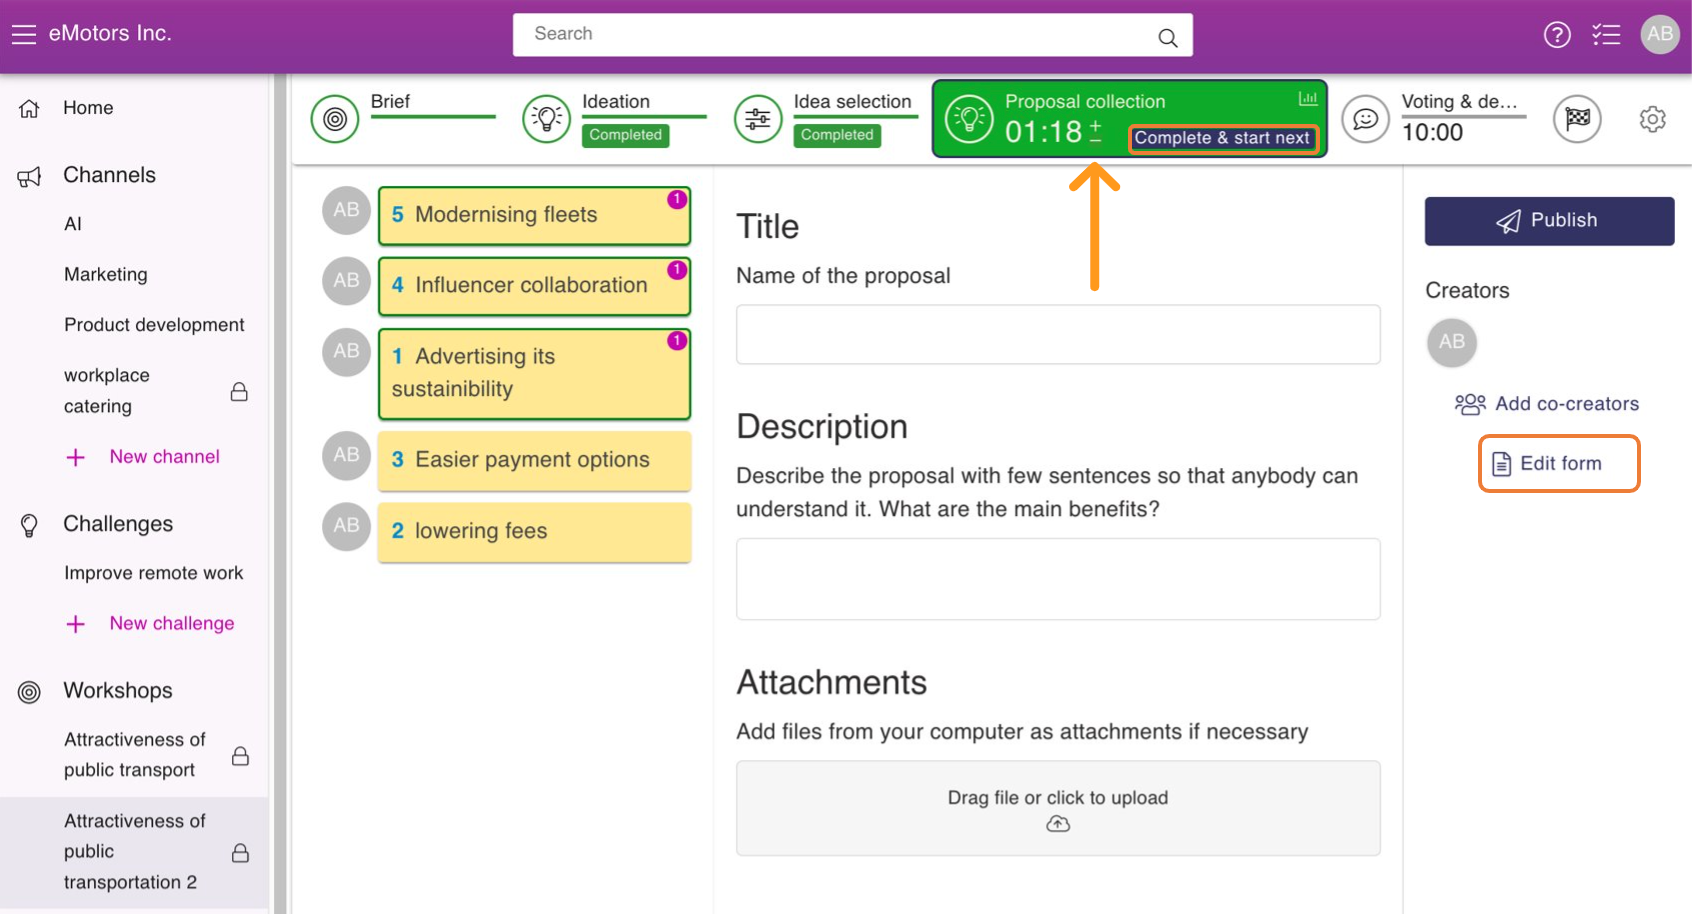
7. Proposal collection
In Proposal collection phase, the goal is to produce more thorough proposals of the most popular ideas. Here are some tips for the proposal collection phase:
- Instruct each participant to create a proposal based on one of their popular ideas. Ask them to develop and refine the idea into a more profound proposal. They can also use insights from other ideas.
- If you invited the AI to participate in the workshop and the participating user has AI credits you will see on the top of the proposal collection form an orange AI area, where you can drag and drop ideas. AI can create you and proposal draft of the ideas that you drag there.
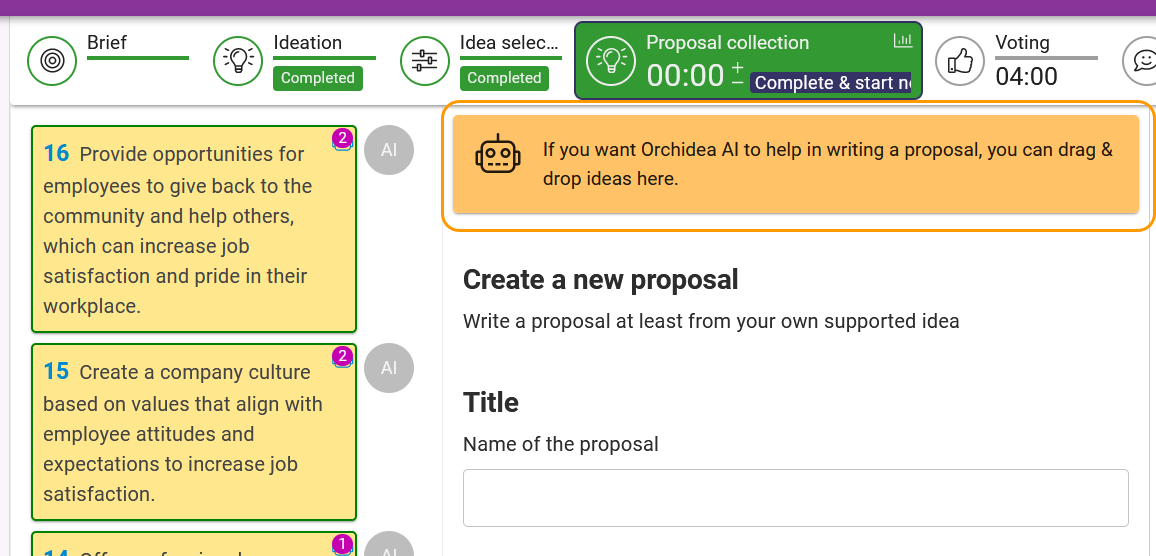
- If you want to get several proposals from everyone, you can ask them to create proposals based on other popular ideas.
- If necessary edit the proposal collection form. You can do it by clicking on Edit form on the right side of the form. If you modify the form, AI will answer with the proposal draft all the fields of the form. Make sure that the fields have a descriptive name and help text so that AI can understand what you are looking for.
- Adjust the phase duration if you want more proposals. You can create two proposals in 10 minutes. Add 4-5 extra minutes for each new proposal you request.
- Finally, press the Complete & start next button to allow participants to move on to the next phase. Tell participants out loud what you're doing.
8. Voting
The goal of the Voting phase is to highlight the most potential proposals by voting and refine them with the participant's comments in the following Development phase.
- Ask participants to read the proposals and like the best proposals
- If necessary, change the maximum number of likes. A good number of likes is about 20 - 30% of the number of proposals. You can change the maximum number of votes in the phase settings by clicking in the right top corner of a phase and opening the Settings tab.
- If needed, adjust the phase duration before starting, but you can also change it while working.
- Finally, press the Complete & start next button to allow participants to move on to the next phase. Tell participants out loud what you're doing.
9. Development
The goal of the Development phase is to refine the most potential proposals with the participant's comments.
- In this phase, the proposal list on the left is sorted based on the number of likes.
- Ask participants to add their development comments on the most voted proposals at the top of the proposal list.
- Create development comments with the help of AI. You can click on Develop further with AI and AI creates a comment you can edit and publish to the proposal.
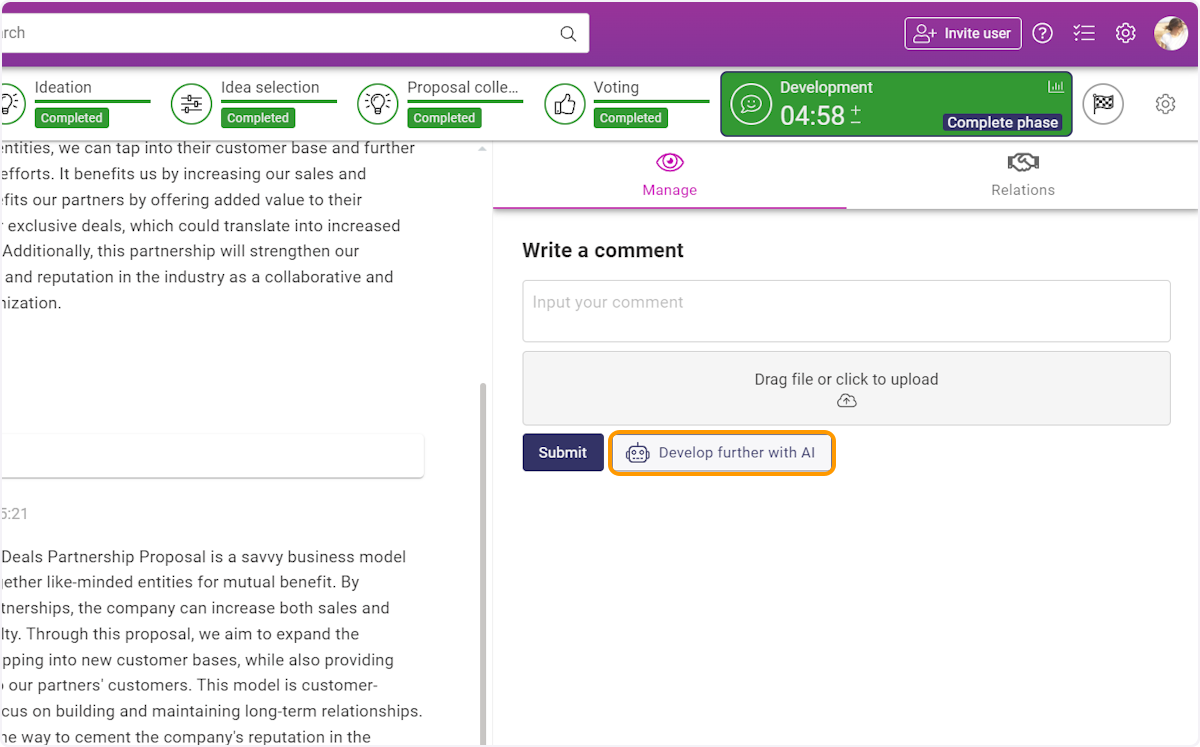
- If needed, adjust the phase duration before starting, but you can also change it while working.
- End the session by clicking Complete phase button.
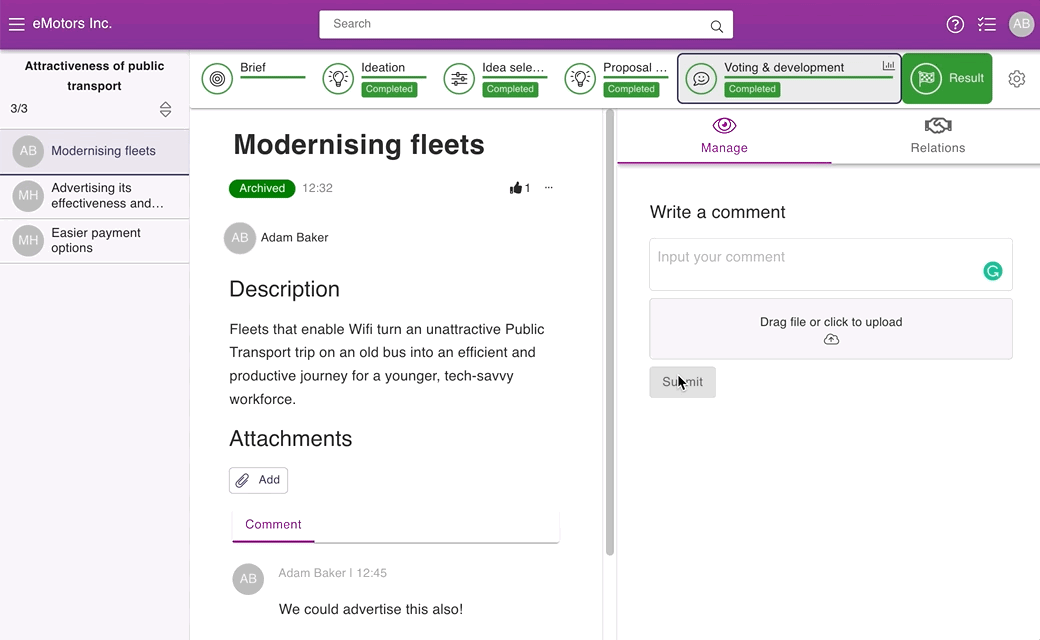
10. Result of the Workshop
When the workshop has come to an end, you can export the proposals to a Word file or transfer them to another workshop, challenge, or channel.
This is how you export your proposals to a Word file:
- Go to the Result phase.
- Click on
 in the upper right corner to get to the list view of the workshop proposals.
 - Check off all the proposals that you want to export.
- Press on
 to finish your exporting.
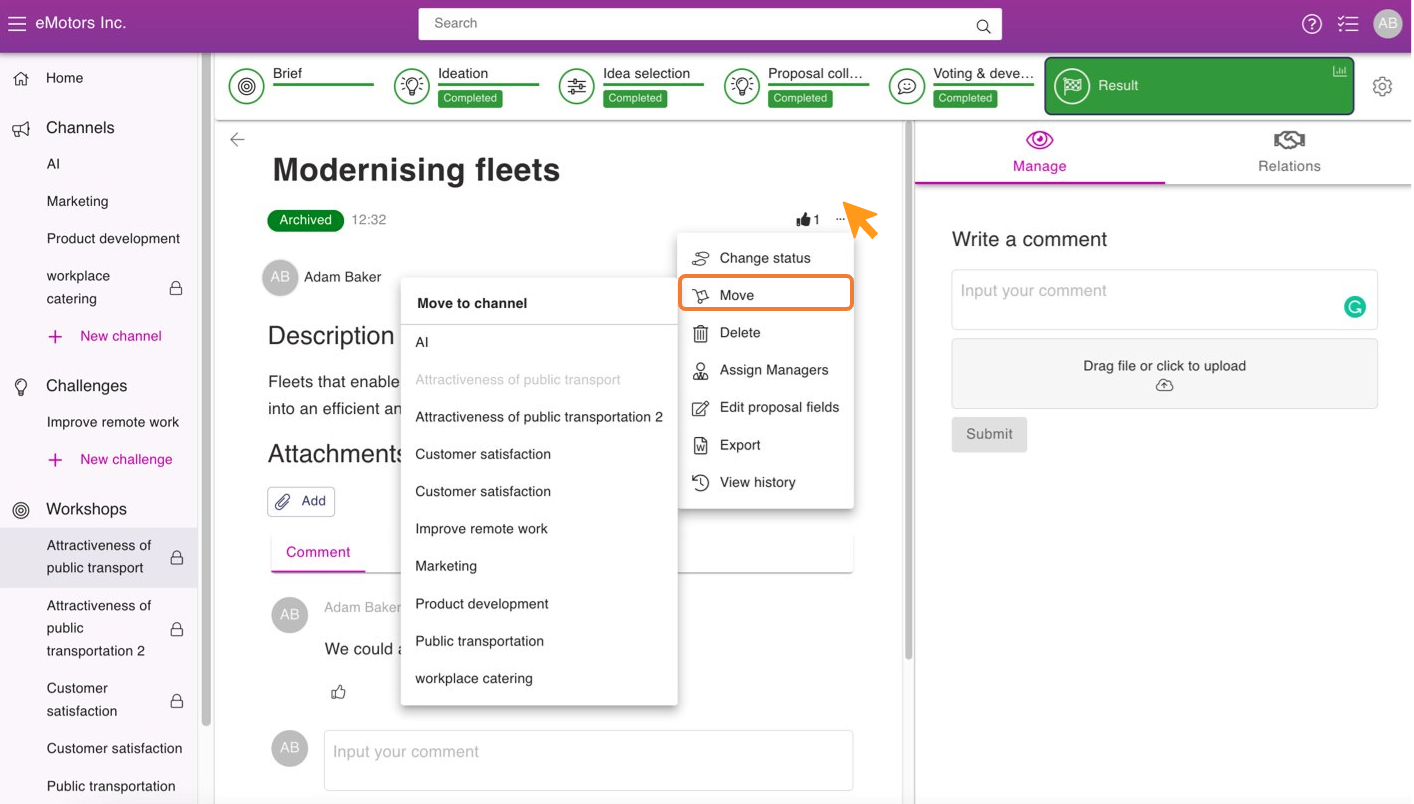
This is how you can move a proposal to another channel:
- Go to the Result phase.
- Press on the name of the proposal that you want to move.
- Click on the
%20asetukset.png?width=24&height=7&name=3%20pistett%C3%A4%20(kolme)%20asetukset.png) in the upper right corner of the proposal.
in the upper right corner of the proposal. - From the opening menu pick Move.
- Press on the name of the channel/challenge/workshop where you want to move it.
- Click Yes to confirm the move.
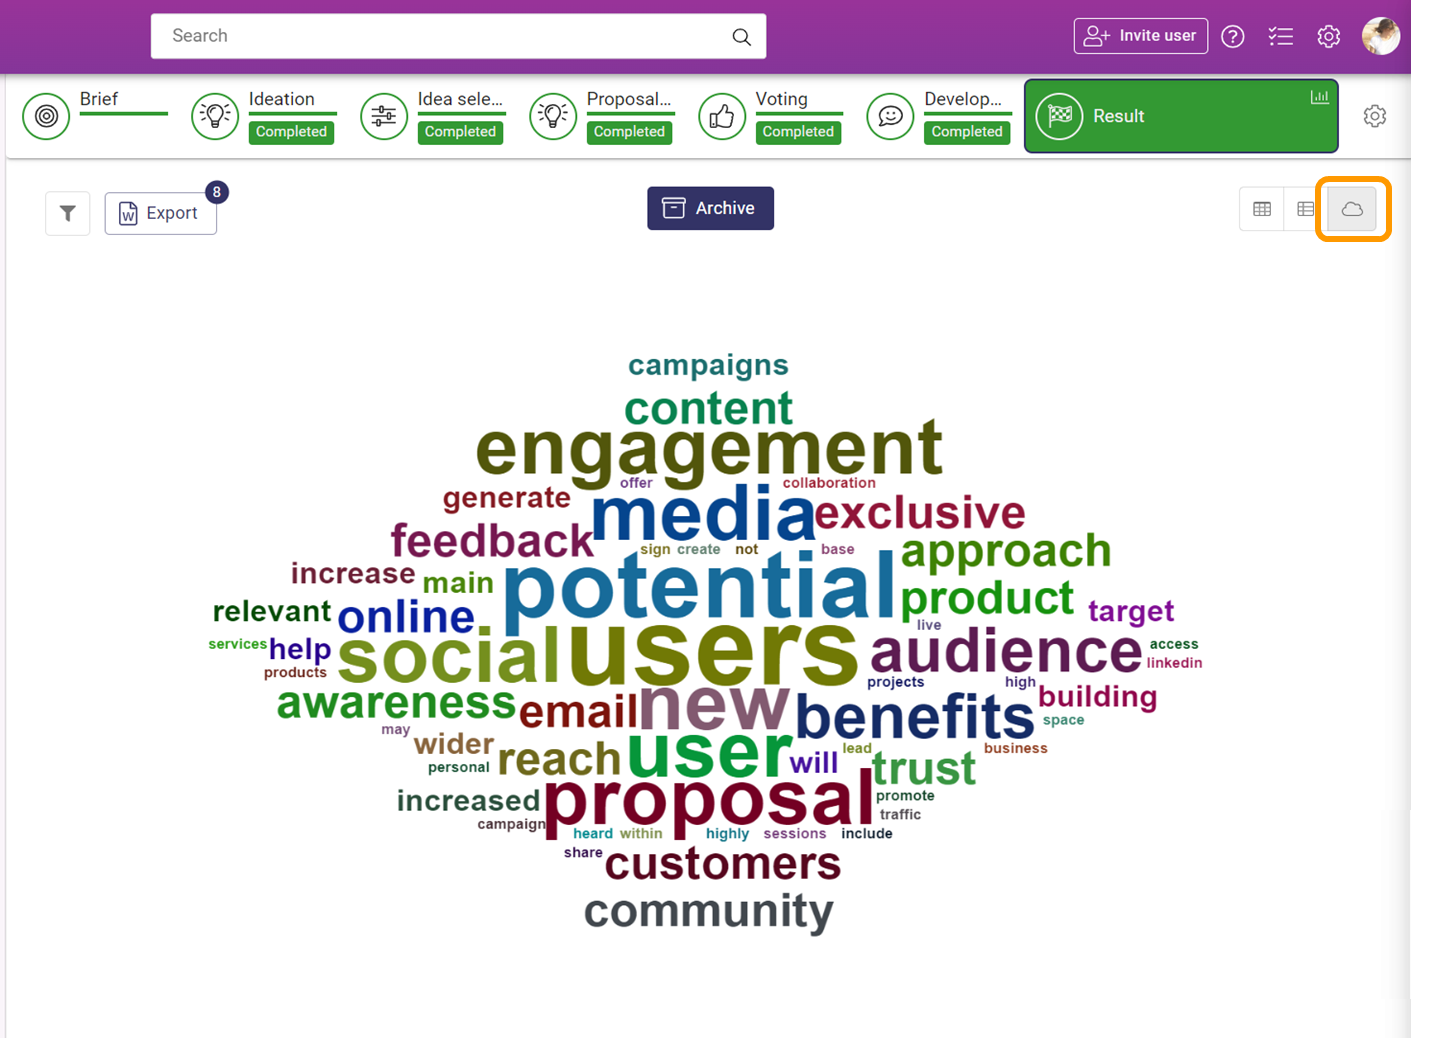
This is how you can analyze the results of a workshop with word cloud:
- Go to the Result phase.
- Click the cloud
 icon in the upper right corner.
 - The most used words in the proposals are shown as a word cloud. By clicking a word, you'll see which ideas belong to that category.
💡 When you're done with the workshop, you can archive it. Read more about archiving a workshop here: Archiving a workshop